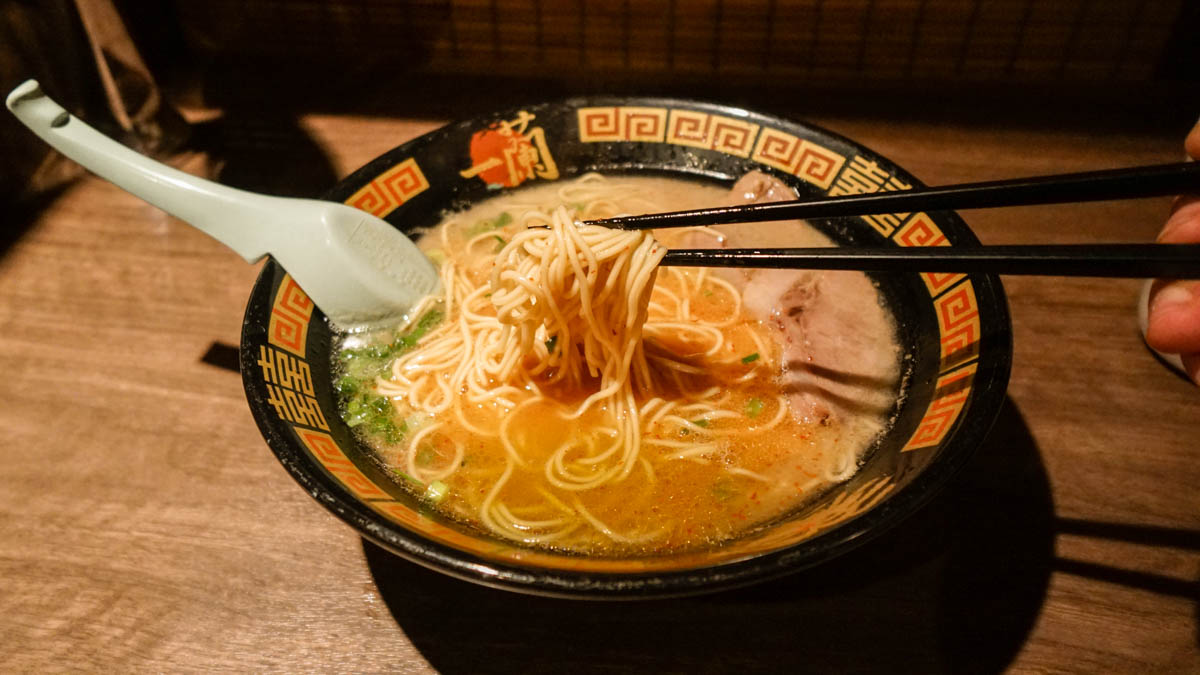
Experience the heart-pounding adrenaline rush at Universal Studios Japan, conquer the summit of Mount Fuji, satiate your inner child at DisneySea and taste the freshest omakase you’ll ever have — all for under S$3.1k.
Backpacking around Japan can be easily summed up with the Chinese saying, “说长不长, 说短不短” (“it’s neither too long nor too short”). 30 days might sound like an eternity, but you’d actually wish you had more time (and money) than you can afford. Alas, the heart wants what the wallet can’t have, but completing this budget backpacking itinerary for under S$3.1k (excluding flights) is certainly not impossible!
Start from the tip of Japan in Hokkaido and journey down south to Kyushu. This 30-day itinerary will include everything to look for in a backpacking experience, particularly for those looking to do a grad trip. From adrenaline-pumping activities and scenic road trips to mouth-watering food, there’s just so much to do! With this itinerary, save over S$300 using the 21-Day Whole JR Pass and ride the bullet train to 12 cities in under a month.
Pre-trip Essentials
Connectivity: 4G WiFi device for ~S$4/day (connects up to 5 devices).
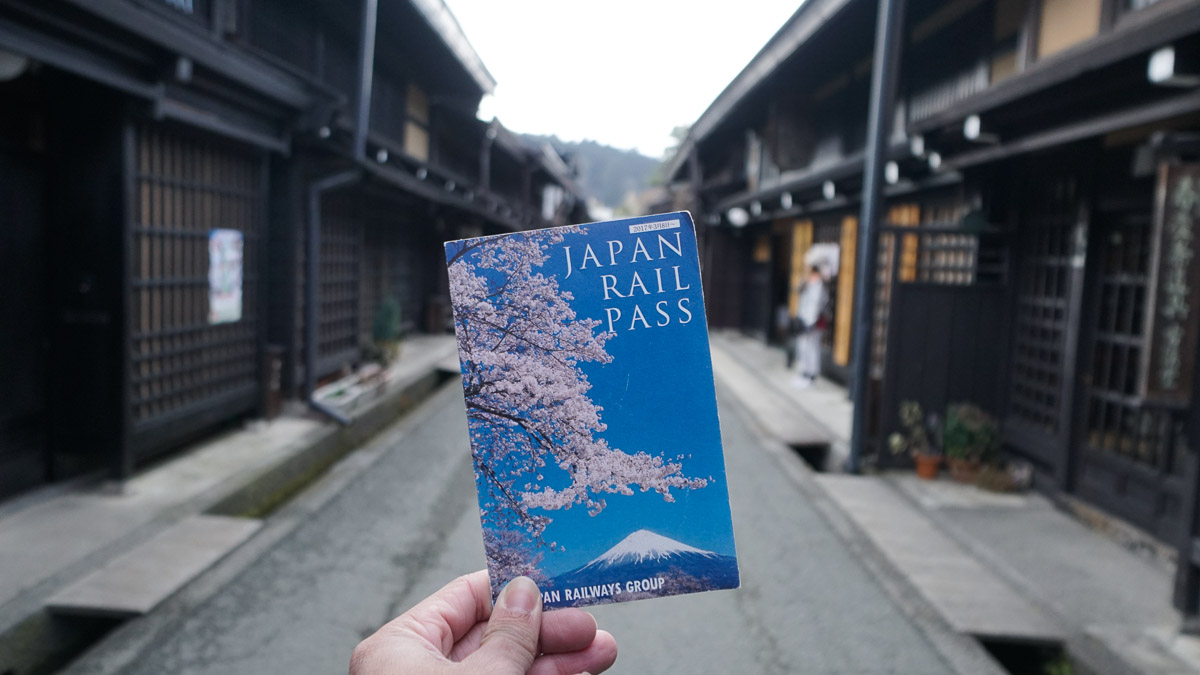
JR Pass: 21-Day Whole Japan Rail Pass. Refer to this JR Pass guide for more information. Receive a S$30 Klook Voucher with every Whole Japan JR Pass purchased before 31st December 2019!
Transportation: Use the JR Pass for long rides between cities. For public transport within cities, use IC cards like Suica (Tokyo), Icoca (Osaka) or the Kitaca card (Hokkaido) — you only need one of these as they can be used throughout Japan and are rechargable.
Car rental: ~S$70/day for Hokkaido, excluding collision damage insurance (¥648/day), the Hokkaido Expressway Pass (HEP) and ETC card rental (¥324). In Kawaguchiko (Mount Fuji), ~S$28/day including insurance.
Flights: This itinerary flies in to Sapporo’s New Chitose Airport and departs from Fukuoka Airport in Kyushu. Flights are not included in the budget as the costs vary depending on the month of travel. You can score Japan flight deals and promos from Skyscanner, but sometimes it may be cheaper for you to land in Tokyo and pay for a shinkansen to Hokkaido.
Budget Breakdown
Accommodation: S$807
Food: S$510
Activities: S$742
Transport: S$1,038 (including 21-Day Whole JR Pass)
TOTAL: S$3,097
Check Flight Prices to Japan
Day 1–5: Hokkaido
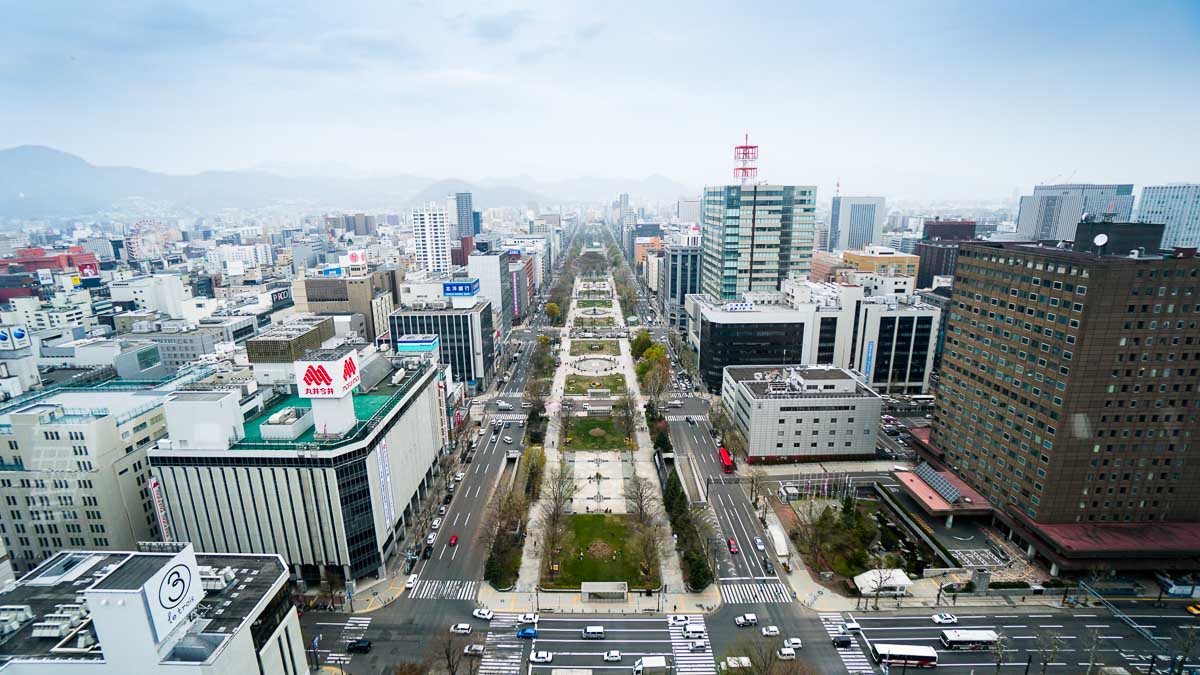
Sapporo City (2D) & Road Trip Around Hokkaido (3D)
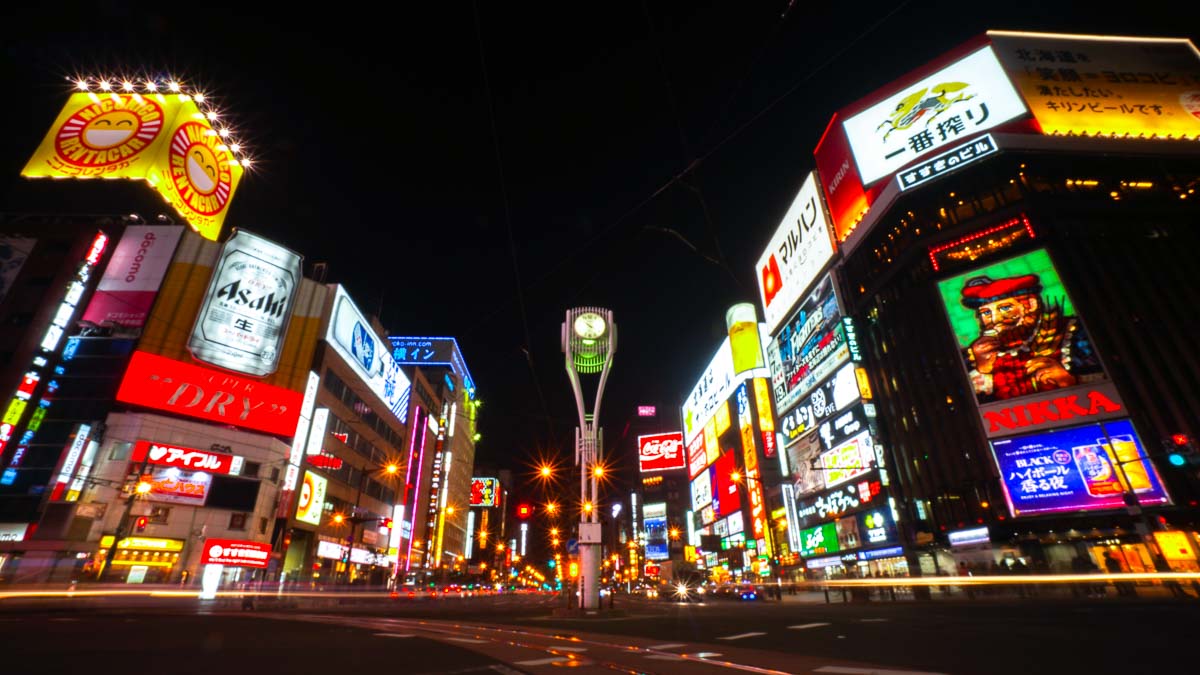
Dive in to the largest city on Hokkaido island, reminiscent of its neon-lit siblings Tokyo and Osaka with its own host of iconic quirks. It’s a destination famous for its white winters, but Sapporo has a great deal to offer even when it’s not covered in a blanket of white.
*Pro-tip: Get 5% off accommodation at Hakodate Kokkusai Hotel and Hotel Sonia Otaru by using <TTI5> under promo code!
Getting from New Chitose Airport to Sapporo — Take airport limousine bus 14 to Nakajima (¥1,030). The bus leaves once an hour and the ride is about 1hr 9mins. Alternatively, the JR Airport Rail leaves about thrice hourly and only takes 37 mins (¥1,070 without reservation).
Getting around in Sapporo: Kitaca is the prepaid IC card by JR Hokkaido. It can also be used on Sapporo’s subways, buses, trams and JR trains. Though you can use this same IC card for transport in Tokyo and Osaka, you can only get card refunds from the city you got it from (i.e. Sapporo), so you’re better off getting a separate IC card after the Hokkaido leg.
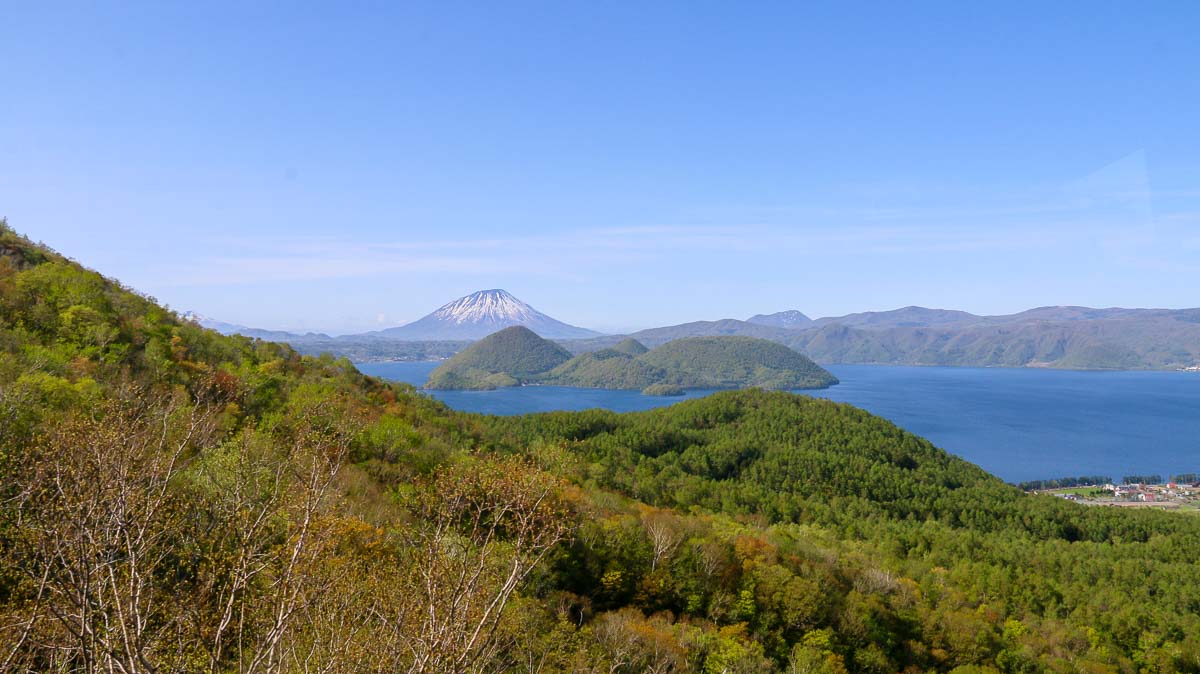
Road trip: While you can explore the outskirts of the city with the 3D JR Hokkaido Pass (S$200), it’s cheaper to rent a car when travelling in a group — for four pax, it’s ~S$140/pax including petrol and add-ons like insurance.
Read also: Budget Hokkaido Itinerary: 8D Spring Road Trip Under S$1k incld. Accommodation
Highlights:
Sapporo TV Tower — Get a stunning bird’s eye view of the city on top of the Sapporo TV Tower (~S$8) pictured above.
Sapporo Bier Garten — Pamper yourself with a 100-minute all-you-can-eat buffet (~S$85) at the Bier Garten (Beer Garden) just beside the Sapporo Beer Museum, with free flow beer to boot!
For other exciting things to do in Sapporo, check out our Sapporo City Guide.
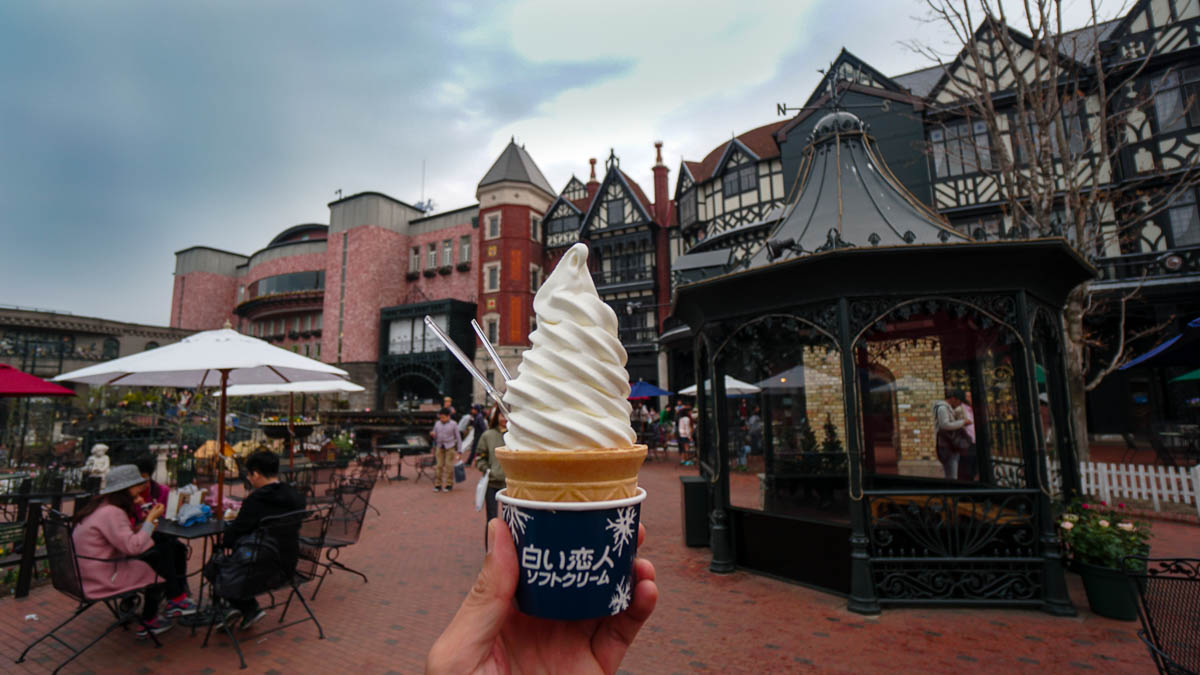
Shiroi Koibito Park (White Lover Park) — Yes, it is the legendary Japanese biscuit sandwich your friends always buy home as souvenirs! After more than a year, Japan’s most famous white chocolate sandwich cookie 白い恋人 (Shiroi Koibito) is re-opening its factory on 12 July 2019. Witness the making of the iconic biscuit sandwich and try a variety of premium chocolate sweets by Shiroi Koibito.
*Pro-tip: For getting around with the in-car GPS, just key in the Map Code or phone number (found on google maps).
After returning the car, activate your JR Pass and get ready for Tokyo!
Day 6–8: Tokyo
When to use the JR Pass:
– Sapporo Station (Super Hokuto towards Hakodate) – Shin-Hakodate-Hokuto Station
– Shin-Hakodate-Hokuto Station (Tohoku-Hokkaido Shinkansen towards Tokyo) – Tokyo Station
Tokyo is home to the busiest seafood market (formerly Tsukiji, now known as Toyosu Market) and train station (Shinjuku Station which has over 200 exits) in the world. It is also the most visited city in all of Japan. From the strikingly unique fashion streets of Harajuku to the insane number of people at the Shibuya traffic crossing, Tokyo will charm you in ways you wouldn’t expect — I never imagined that I’d pay for a cup of coffee at Starbucks just to watch people cross the road, for one.
Getting around in Tokyo: Tokyo Subway Ticket (72 hours) — Purchase online and collect from the Harajuku Tourist Information Centre. Alternatively, reload your Kitaca card from Sapporo.
Highlights:
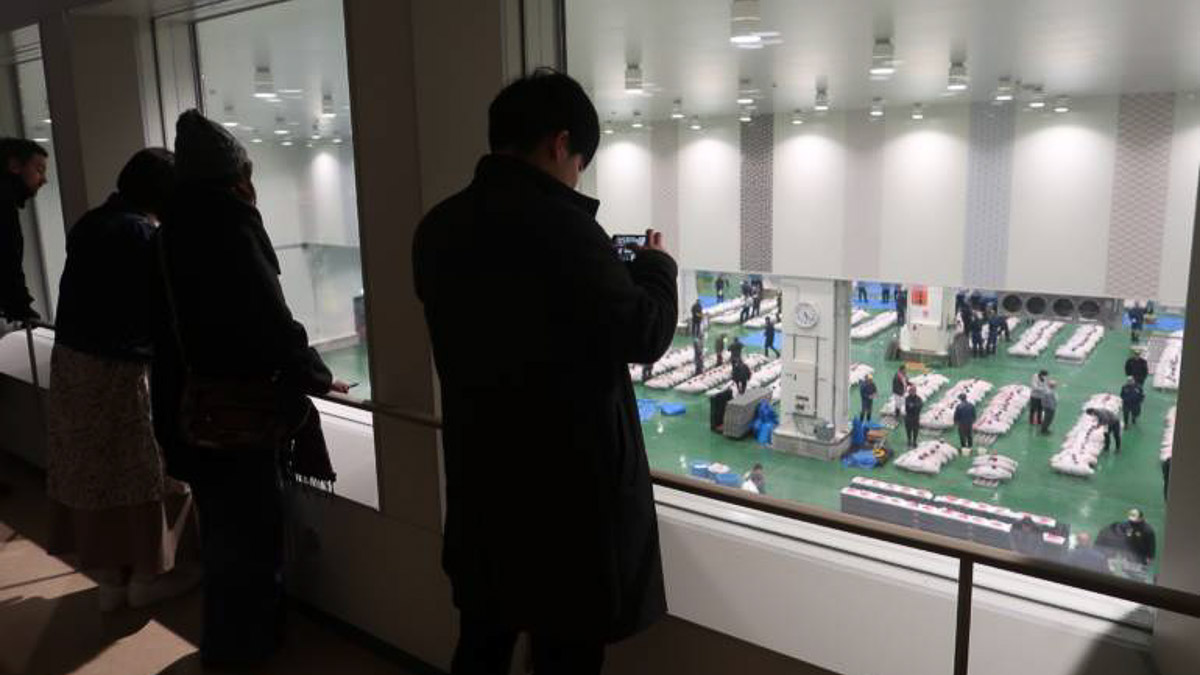
Toyosu Market Tuna Auction — Still an extremely popular tourist activity, the auction has been relocated from the former Tsukiji to the new Toyosu Fish Market as of October 2018.
Remember to make reservations in advance to catch the auction up close (ground floor observation deck). Alternatively, view the auction from the observation windows on the upper-floor (no reservation required).

Watch sumos in action — The Japanese experience doesn’t get any more authentic than catching real life sumos in action at the Arashio-Beya Sumo Stable.
Oedo-Onsen Monogatari in Odaiba — Built on an artificial island in Tokyo Bay, Odaiba is just 30 minutes from Tokyo Station. And while onsens are aplenty in Japan, this one has over 13 different types of natural hot springs to choose from, an in-house eatery, a shopping arcade, and free yukatas to stroll about in!
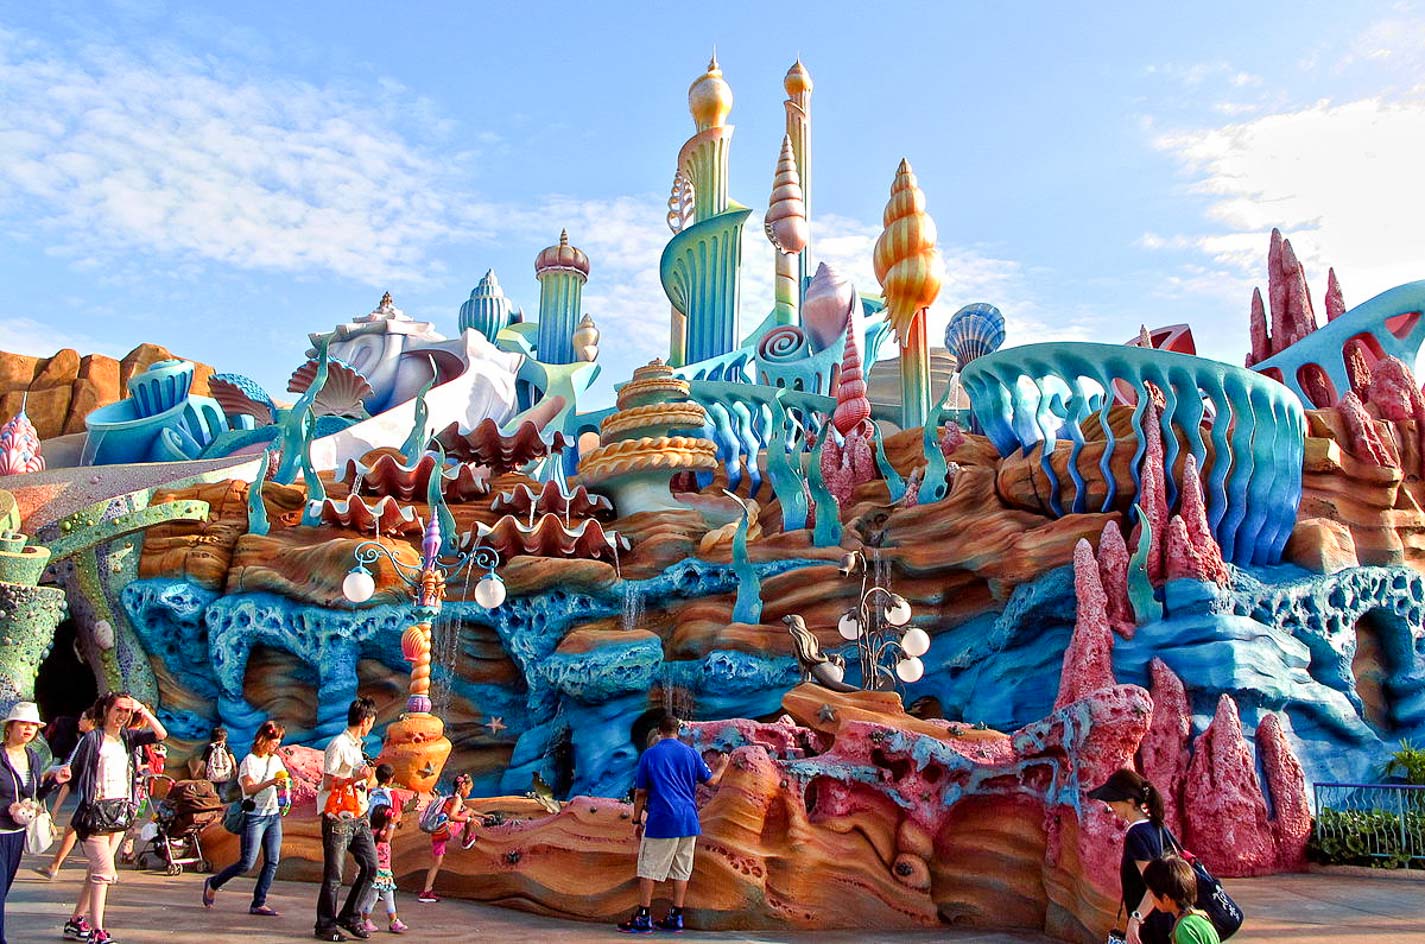
Tokyo DisneySea — Who says Disney is only for kids? Get wowed and taken back in time in this lively entertainment complex. Check out our Tokyo Disneyland and DisneySea guide for tips and tricks on how to have the best experience.
If you’re more of a foodie, eat your way around Tokyo with our Tokyo Food Guide!
Day 9–10: Hakone
When to use the JR Pass:
– Odawara Station (Tokaido Line towards Atami) – Atami Station
– Atami Station (Tokaido Line towards Hamamatsu) – Fuji Station
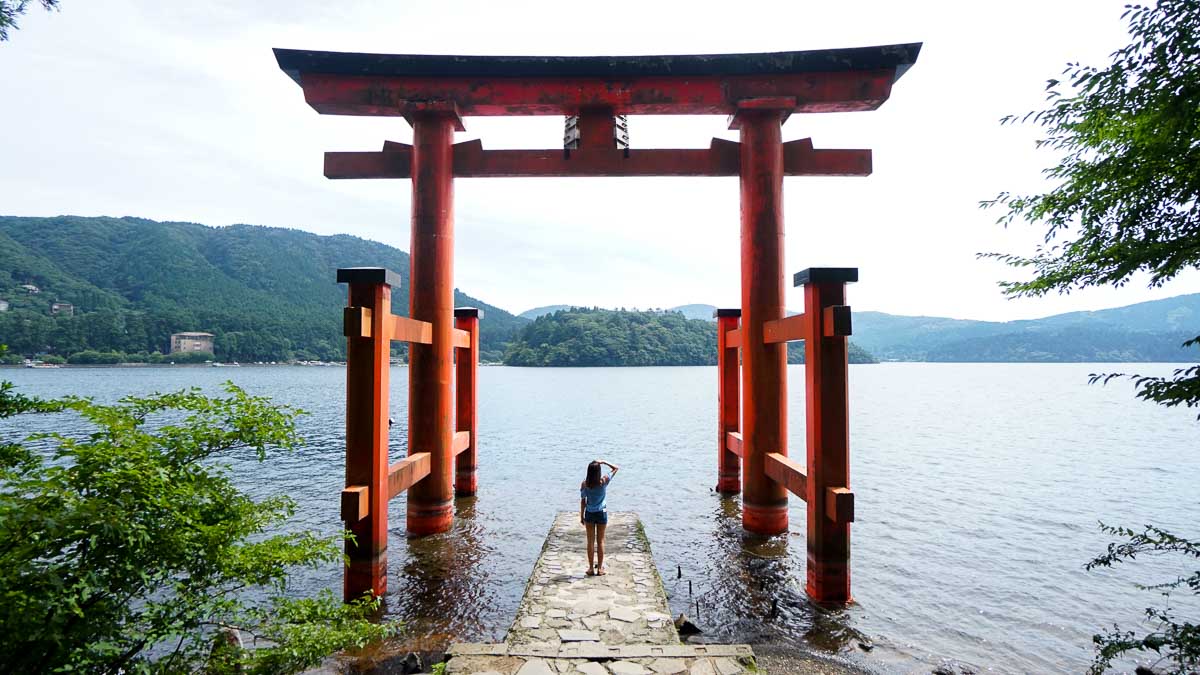
A famous onsen destination and the perfect spot to cruise around for mesmerising views of Mount Fuji, Hakone is also within the borders of a volcanically active park – yikes! But that’s precisely what makes it the ideal destination for hot springs.
People typically visit Hakone as a day trip, but we find spreading it across two days much more relaxing. Check out what are the top 10 places to visit in Hakone!
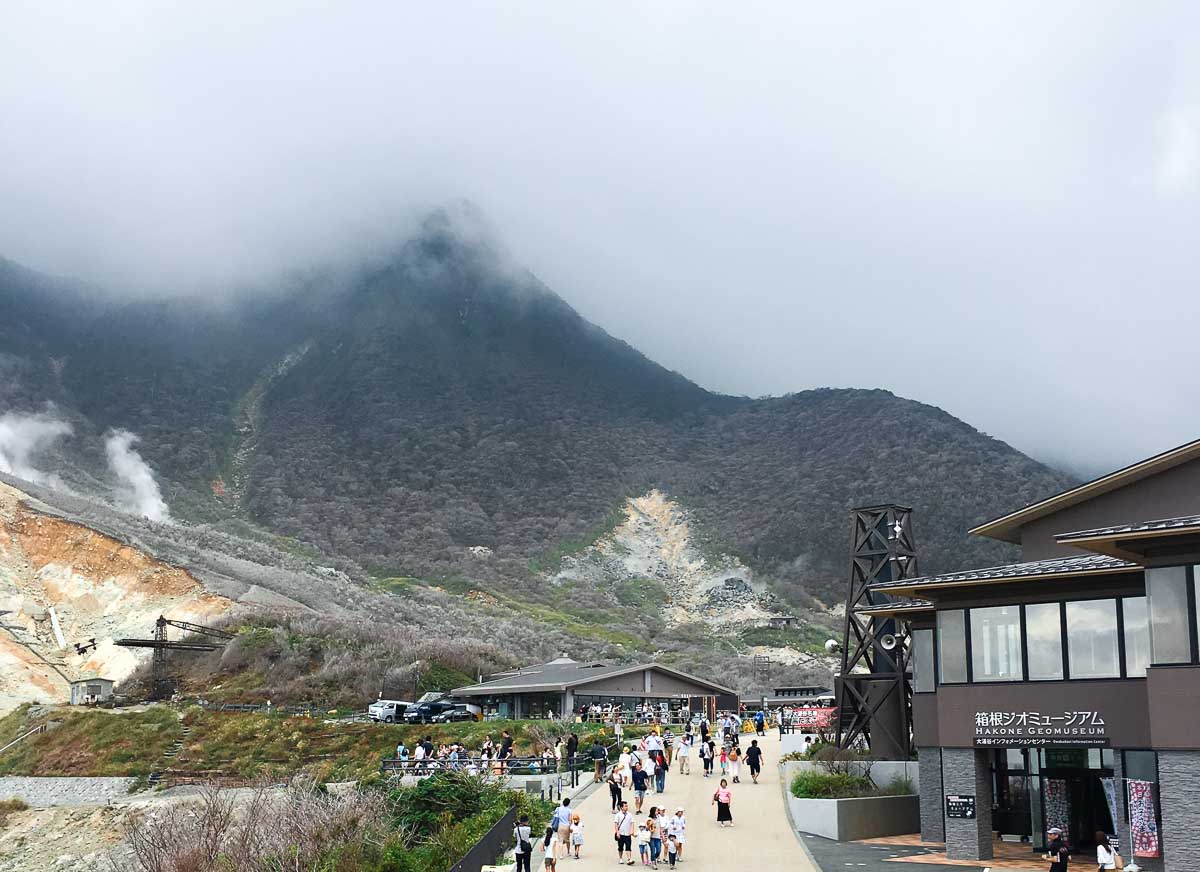
Getting around in Hakone: Get your 2-Day Hakone Free Pass(~S$62) to enjoy unlimited rides on all the main transportation in Hakone.
Everything you need to know about planning your visit can be found in our Hakone Travel Guide — The Most Scenic Day Trip From Tokyo.
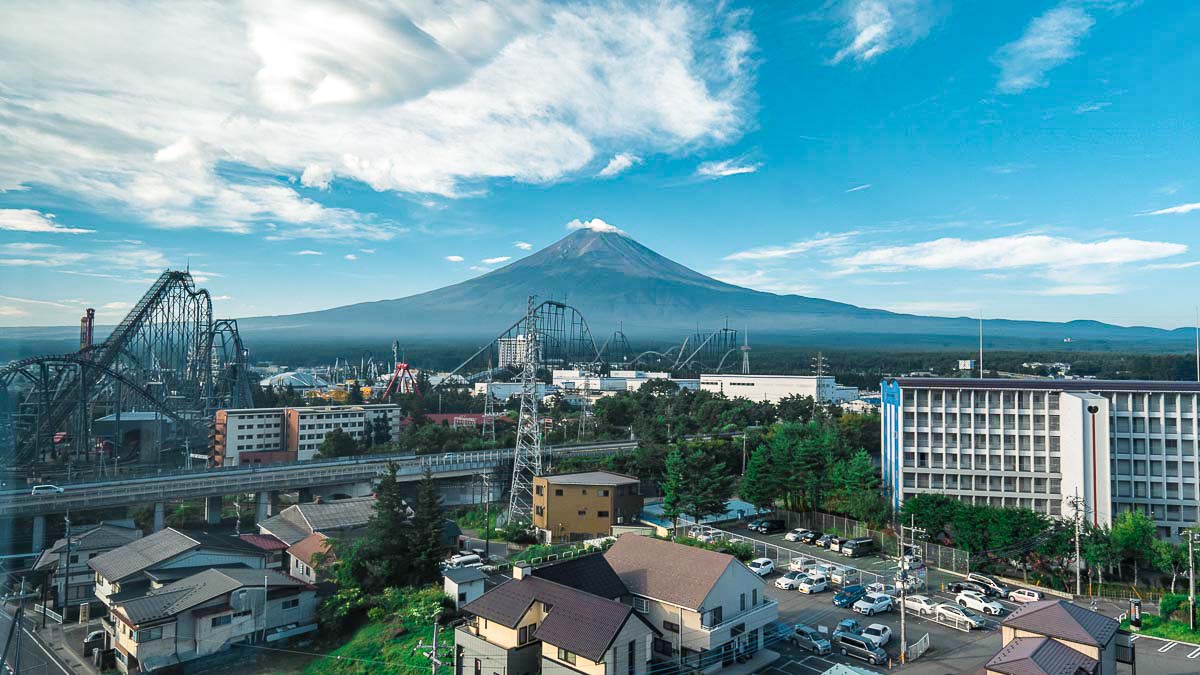
Day 11–15: Mount Fuji
When to use the JR Pass:
– Fuji Station (Tokaido Line towards Shizuoka) – Shizuoka Station
– Shizuoka Station (Tokaido-Sanyo Shinkansen towards Shin-Osaka) – Kyoto Station
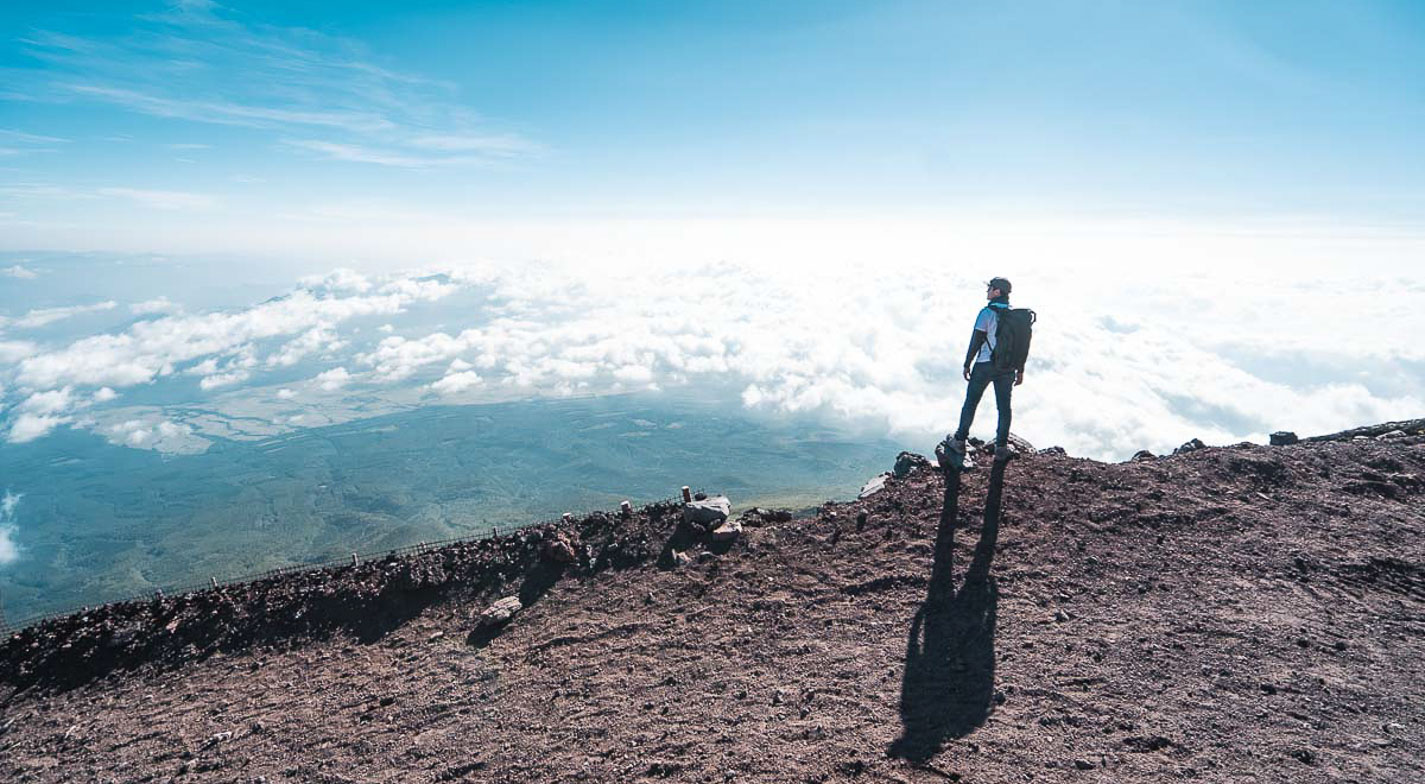
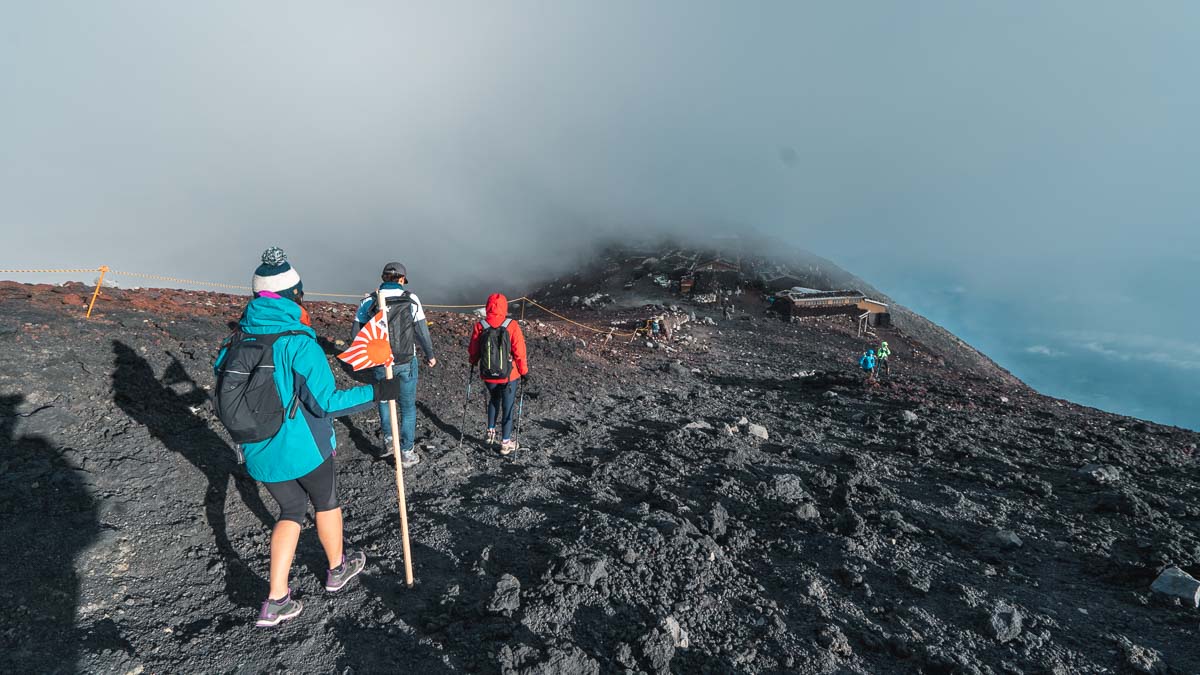
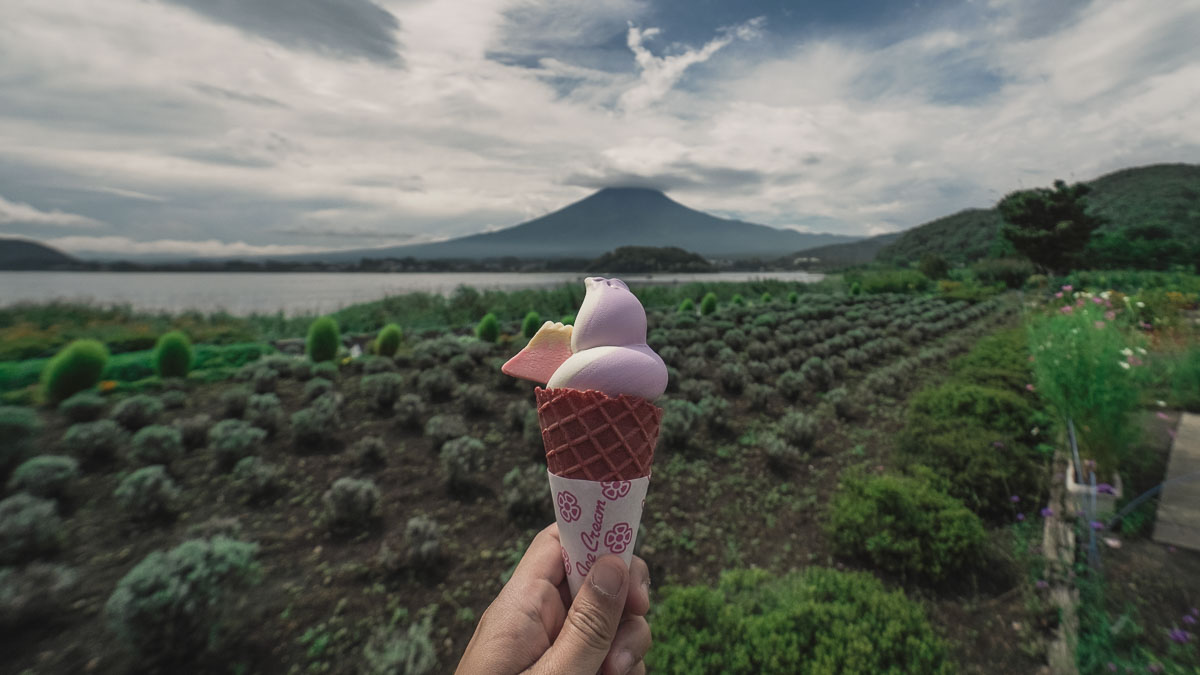
Mount Fuji is one of the most iconic symbols of Japan. Despite being open to the public just two months in a year, Mount Fuji sees some 300,000 climbers each year making it the most climbed mountain in the world! And now that you know how climbable it is, it’s time for your big ascent!
Highlights:
Climb Mount Fuji — Not only will you get to check this off your bucket list, you’ll also get to burn off all the calories you would’ve packed on in the past 10 days of the trip. Find out when the climbing season is along with other tips and tricks in our Guide to Climbing Mount Fuji!
How to get there: Take the Subaru Line from Kawaguchiko Station to Fuji Subaru 5th Station.
*Pro-tip: If you’re staying at Kawaguchiko Inn (opposite Kawaguchiko Station), leave your bulky non-essentials there before your hike.
Fuji-Q Highland — If Disneyland/DisneySea isn’t your cup of tea, here’s a fun alternative — Fuji-Q Highland! Unlike regular amusement parks, entrance to Fuji-Q is free and you pay per ride. Thankfully, there’s the Fuji-Q 1 Day Free Pass (~S$64.15) that gives you unlimited rides in the park! Find out how to best utilise this day pass in our Fuji-Q Highland Guide.
 Oshino Ninja Village — In my opinion, this is almost as authentic as getting to watch real life sumo action. Put on a ninja outfit (¥1,300 with entrance) and practice your shuriken throws at Oshino Ninja Village!
Road trip around Fuji — Exploring Kawaguchiko and Mount Fuji is easier with a car. With 24 hours left in Fuji, we rented a vehicle from Toyota Rent A Car for ¥2,295/pax for the four of us including insurance. Alternatively, there’s always public transport!
Day 16–18: Kyoto
When to use the JR Pass:
– Fuji Station (Tokaido Line towards Toyohashi) – Shizuoka Station
– Shizuoka Station (Tokaido-Sanyo Shinkansen towards Shin-Osaka) – Kyoto Station
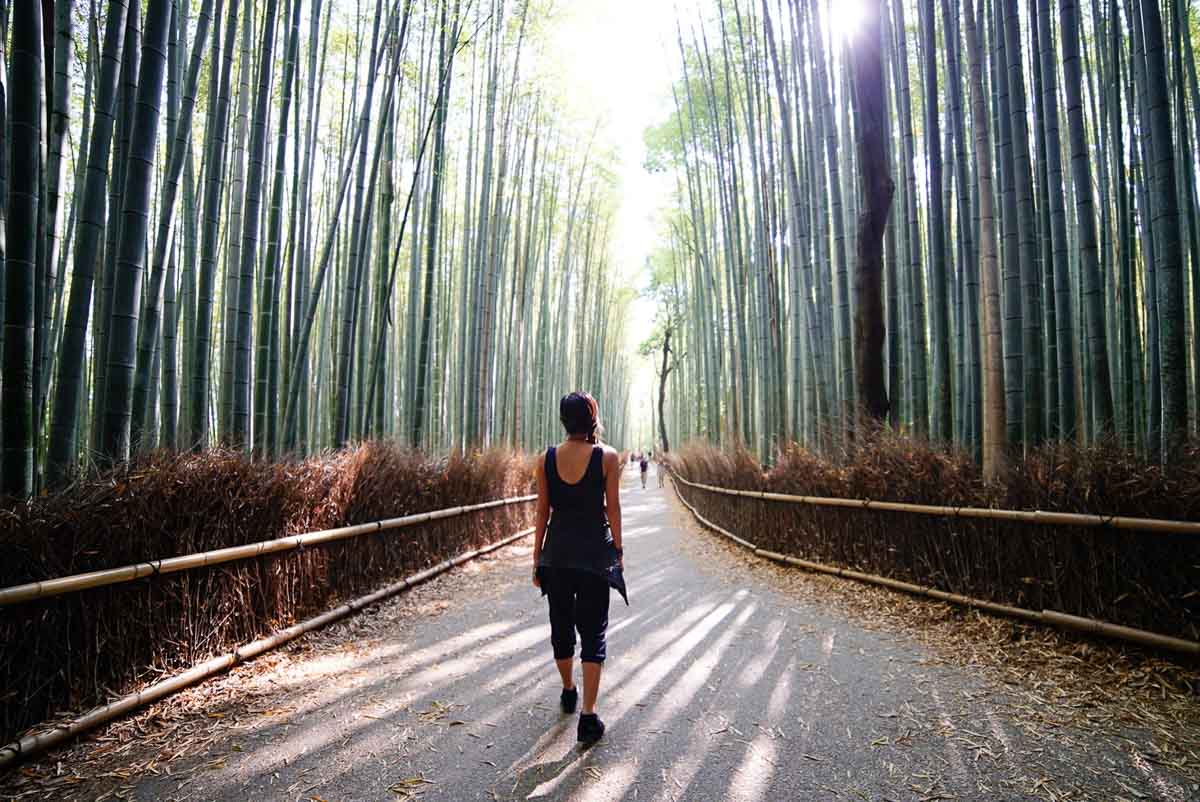
The mother of all shrines that’s also home to the famous Arashiyama Bamboo Forest, the former capital of Japan is best known for its quaint heritage sites.
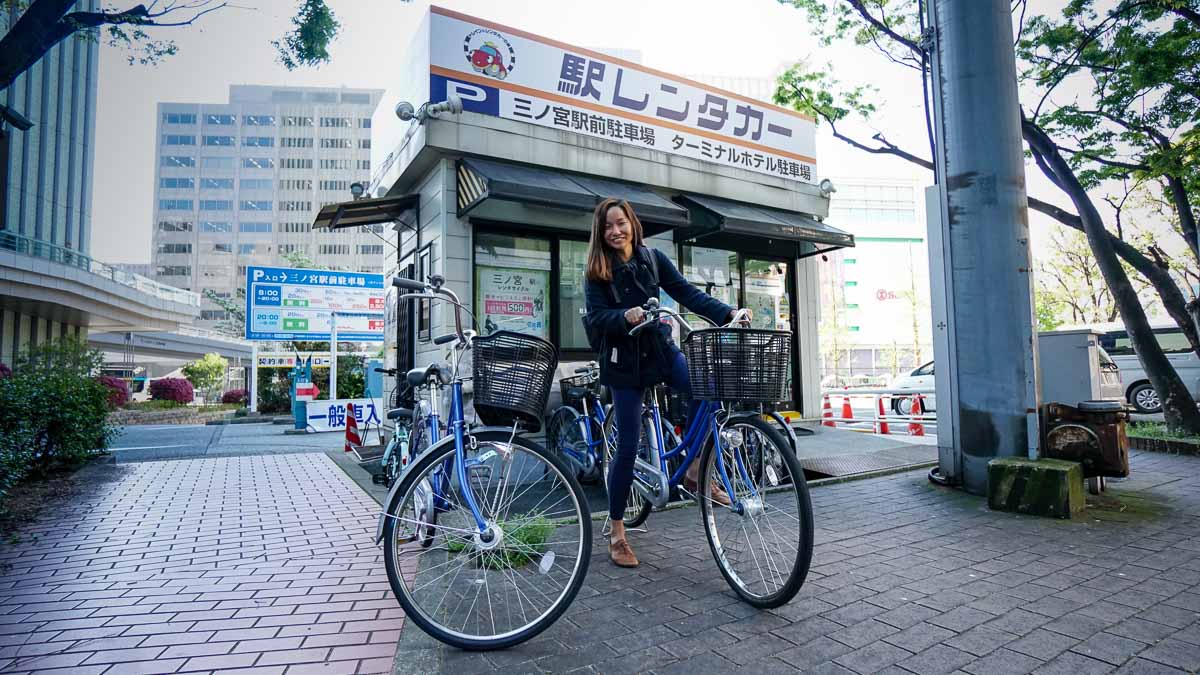
Getting around in Kyoto: Rent a bicycle from Ekirin Kun (free when you show your JR Pass) and cycle around the city!
Highlights:
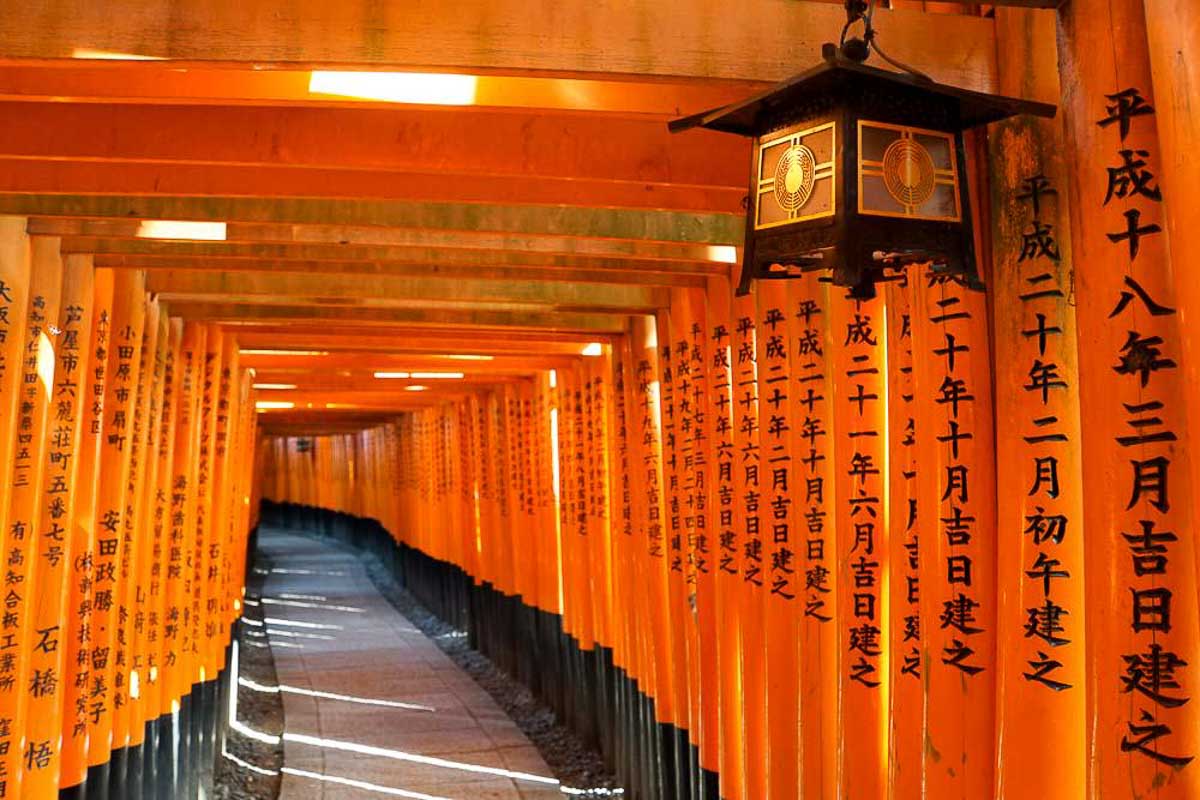
Temple hop around Kyoto by bike — Discover world-renowned historic sites around while whizzing through the city. Fun fact: each of the torii gates at the Fushimi Inari Shrine were donations by people and companies around the world! The smaller gates start from a whopping ¥400,000 (that’s close to S$5,000!).
Read also: Kyoto Budget Guide for more things to see, do and eat.
Day 19: Kyoto — Nara — Osaka
When to use the JR Pass:
– Kyoto Station (Nara Line towards Nara) – Nara Station
– Nara Station (Yamatoji Line towards Osaka) – Osaka Station
Getting around in Nara: Leave your luggage in storage lockers at the station and grab a free Ekirin bike with your JR Pass.
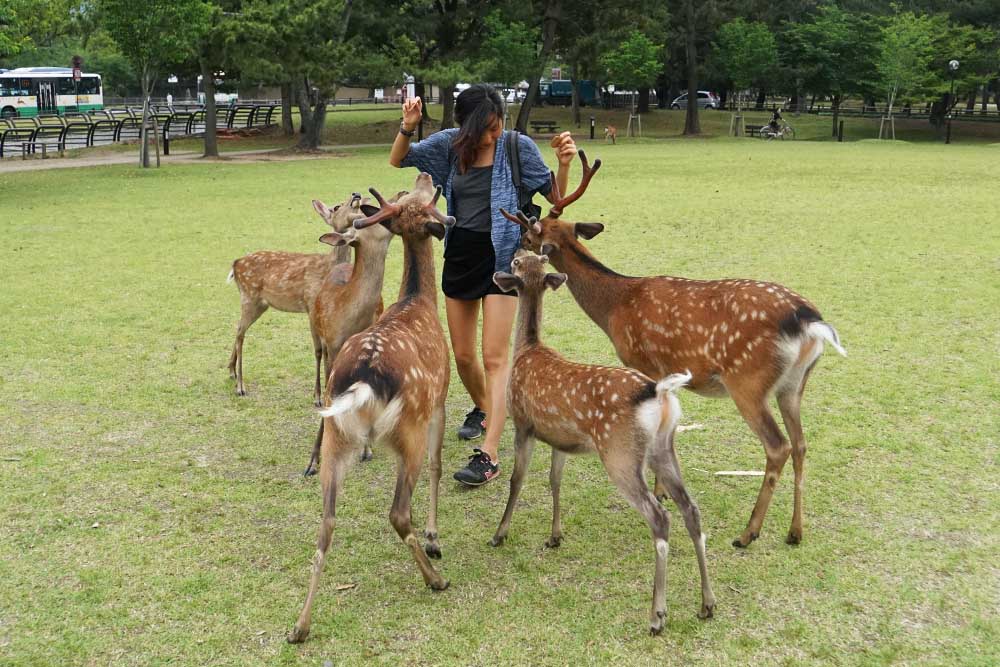
Yup, it’s the one place everyone goes to feed deer. And apparently, you don’t have to specially make a visit to the deer park — they roam the grounds freely! Grab a pack of biscuits from vendors around the park (¥150) to feed the deer with. Read our Nara Budget Guide for other things to do in Nara.
Retrieve your bags and head to Osaka for the night!
Day 20–21: Osaka
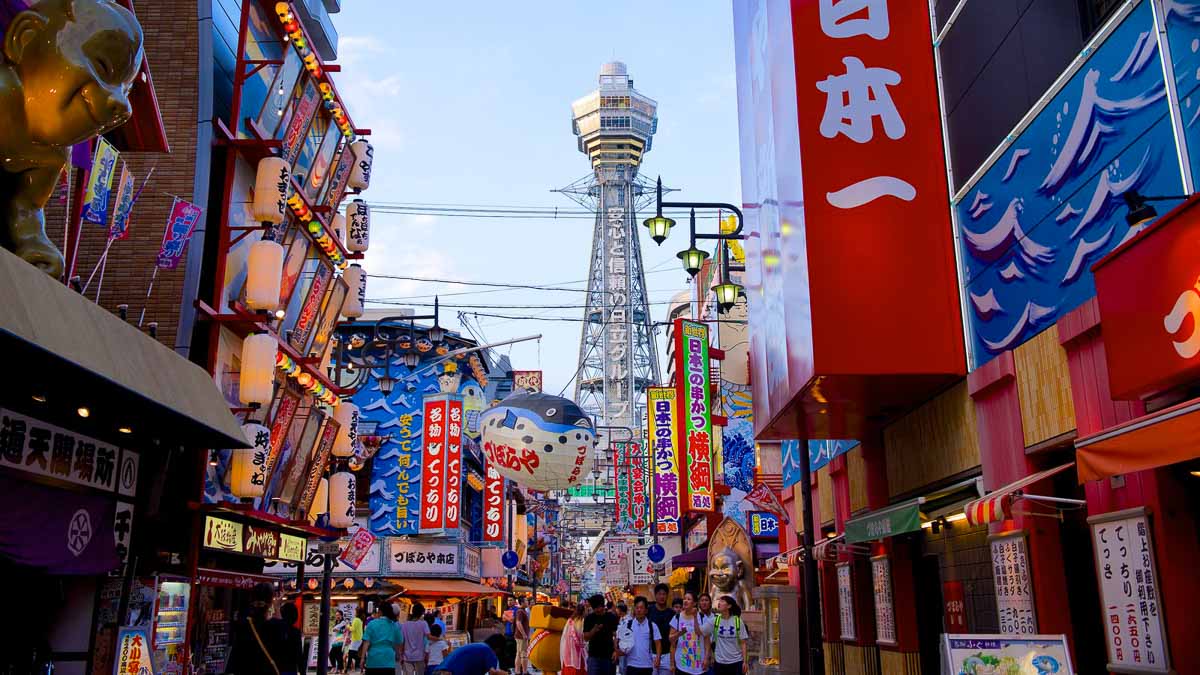
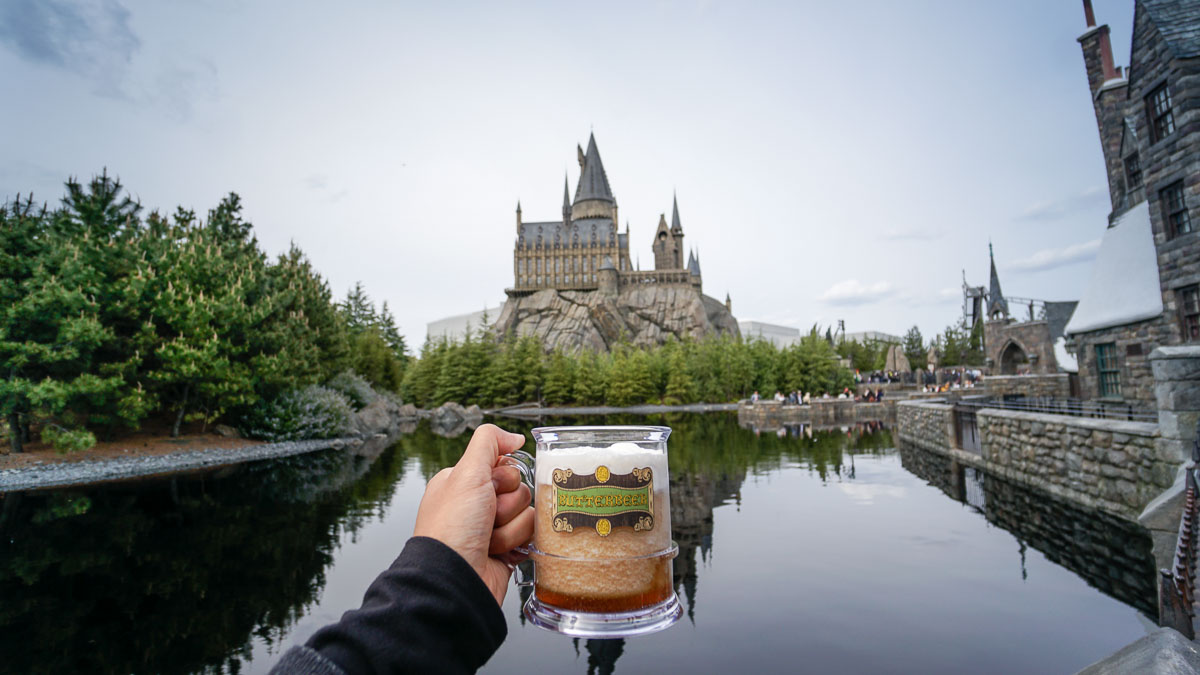
Osaka isn’t just known for its food — hello, takoyaki and okonomiyaki — but also its warm, friendly people that many like to contrast with the Tokyo crowd. And of course, when in Osaka, you can’t miss Universal Studios Japan!
Getting around in Osaka: Enjoy unlimited rides on buses and local trains (except JR trains) with the Osaka Amazing Pass (S$30.35).
Highlights:
Universal Studios Japan — Skip the queues and buy your USJ tickets online so you can head straight to the park when it opens.
Find out other ways to save your time and money with our ultimate USJ guide to planning a magical experience!
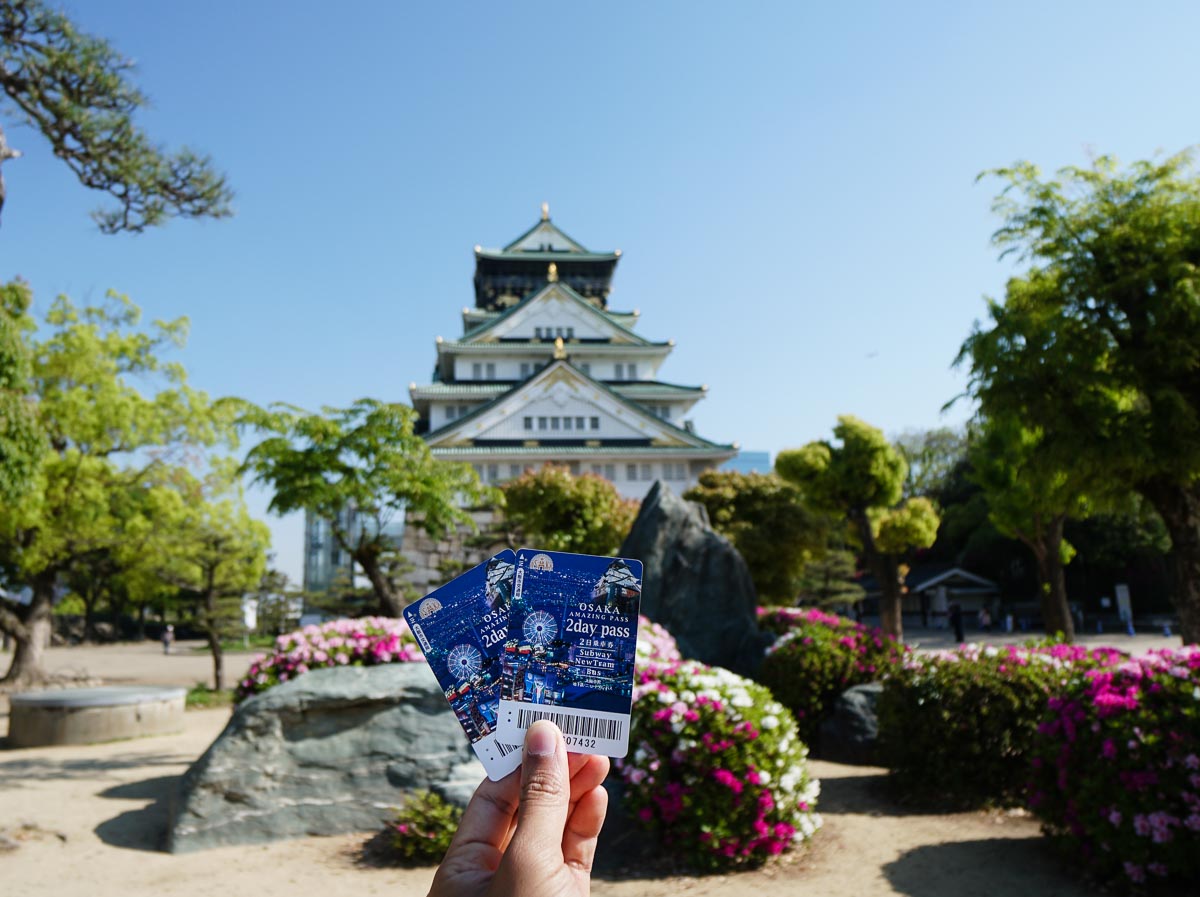
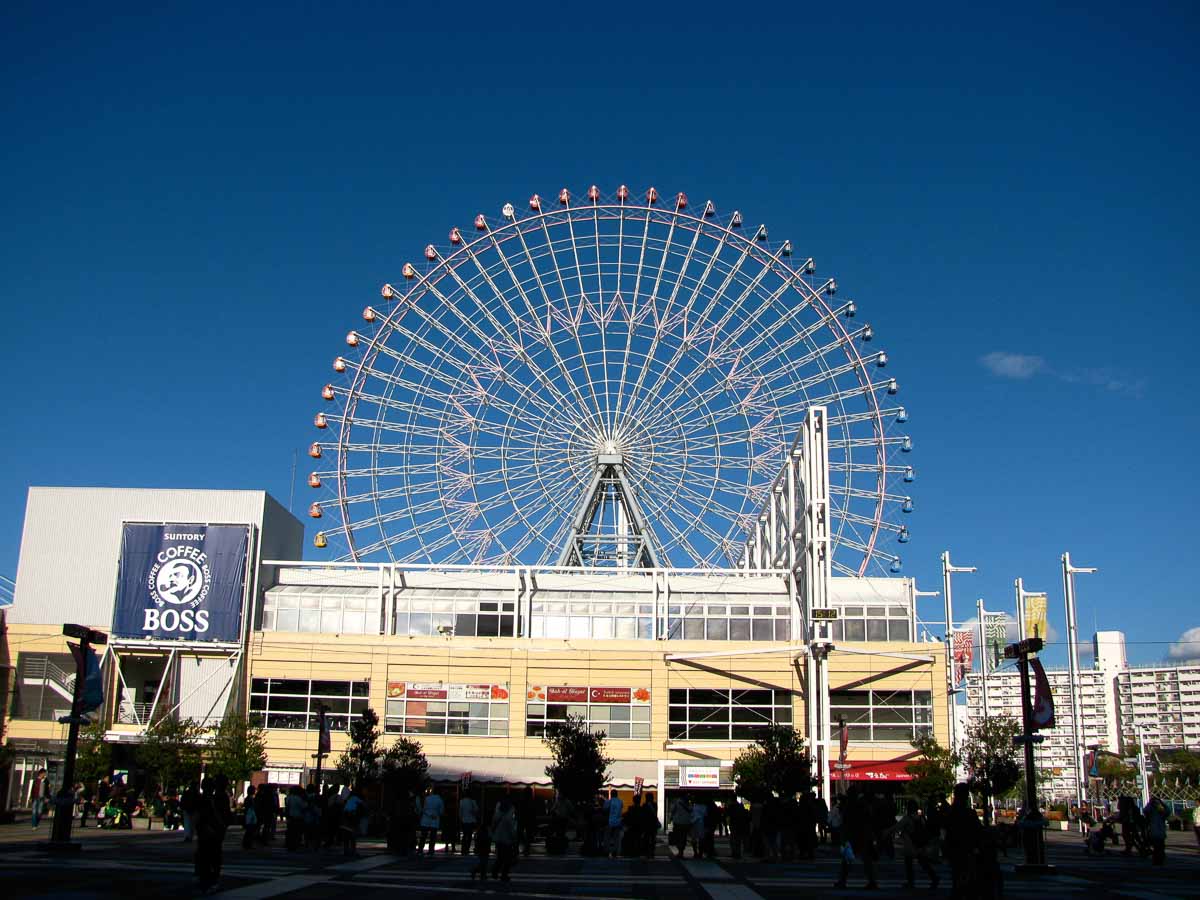
Sightsee with the Osaka Amazing Pass — The Osaka Amazing Pass (S$30.35) gives you free entry to 33 attractions, discounts at restaurants and shops, as well as free rides on all buses and local trains (except JR lines). Redeem your pass at the OCAT building in JR Namba station (Information Center of Japan Holiday).
Psst, visiting just the Osaka Castle, Osaka-jo Gozabune Boat and Tempozan Giant Ferris Wheel (total ~S$33) would already make the pass worth the money!
*Pro-tip: Pick a weekday to activate the pass as some free admissions are not applicable on weekends.
Check out our Osaka Budget Guide for food options and other things to do in Osaka!
Day 22: Hiroshima — Naoshima — Hiroshima
When to use the JR Pass:
– Osaka Station (Tokaido-Sanyo Line towards Kyoto) – Shin-Osaka Station
– Shin-Osaka Station (Tokaido-Sanyo Shinkansen towards Kagoshimachuo) – Okayama Station
– Okayama Station (Uno Line towards Uno) — Uno Station (Naoshima)
– Uno Station (Uno Line towards Okayama) – Okayama Station
– Okayama Station (Tokaido-Sanyo Shinkansen towards Kagoshimachuo) – Hiroshima Station
Ferry not covered by JR Pass:
– Uno Station (Shikoku Ferry) — Naoshima (¥520 round trip)
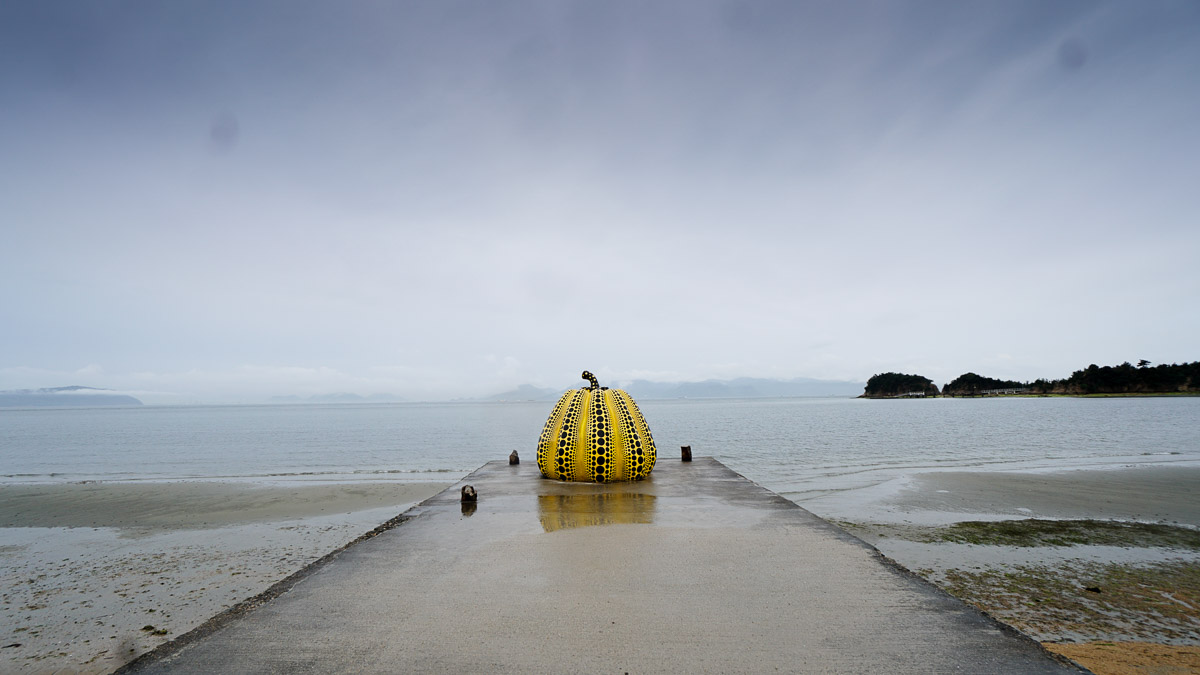
Deposit your luggage at the lockers in Uno Station before hopping on the ferry. Naoshima is famous for its contemporary art displays that are spread throughout the island, like this photogenic piece by the legendary Yayoi Kusama. Spend a relaxing day walking or biking around the island museum.
Day 23: Hiroshima – Okunoshima – Hiroshima
When to use the JR Pass:
– Hiroshima Station (Tokaido-Sanyo Shinkasen towards Tokyo) – Mihara Station
– Mihara Station (Kure-Line towards Hiroshima) – Tadanoumi Station (Bunny Island!)
– Uno Station (Uno Line towards Okayama) – Okayama Station
– Okayama Station (Tokaido-Sanyo Shinkansen towards Kagoshimachuo) – Hiroshima Station
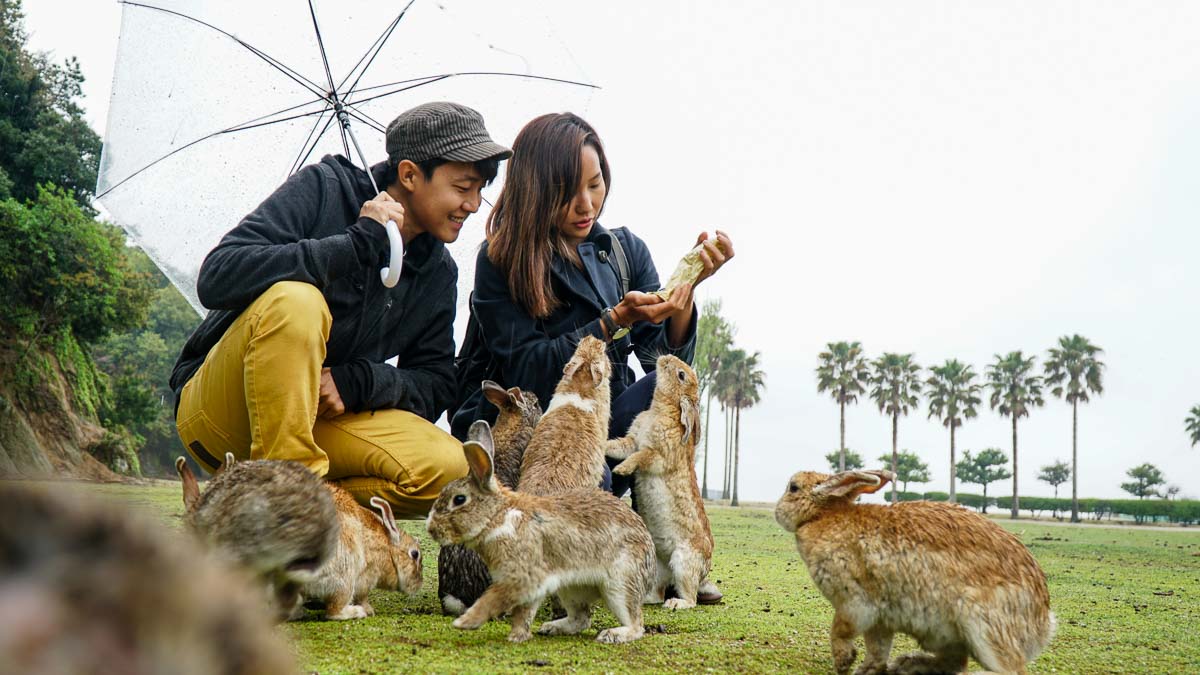
Just an hour away from Hiroshima, a day trip out to bunny island (okunoshima) will surely tug at your heartstrings. Our 8-Day Kansai Itinerary contains all the deets for your Hiroshima leg!
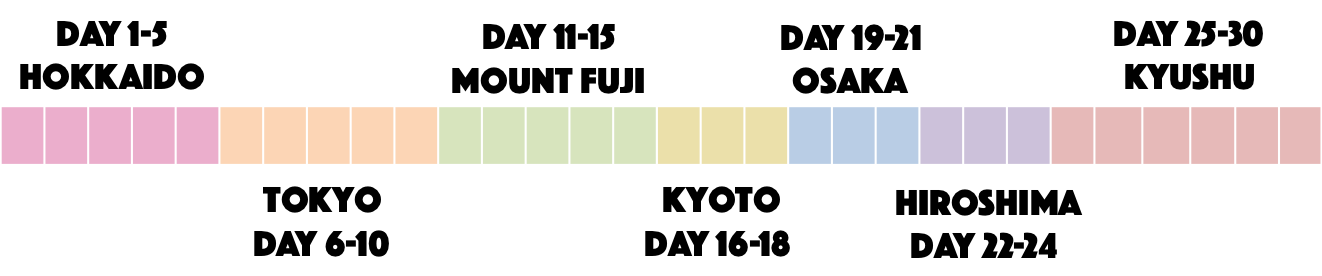
Day 24: Hiroshima – Miyajima
When to use the JR Pass:
– Hiroshima Station (San-yo Line towards Iwakuni) — Miyajimaguchi Station
– JR Miyajima Ferry — Miyajima Island
– Miyajimaguchi (San-yo Line towards Itozaki) — Hiroshima Station
Getting around Hiroshima: Rent an Ekirin bicycle in Hiroshima to explore the city’s sights.
Highlights:
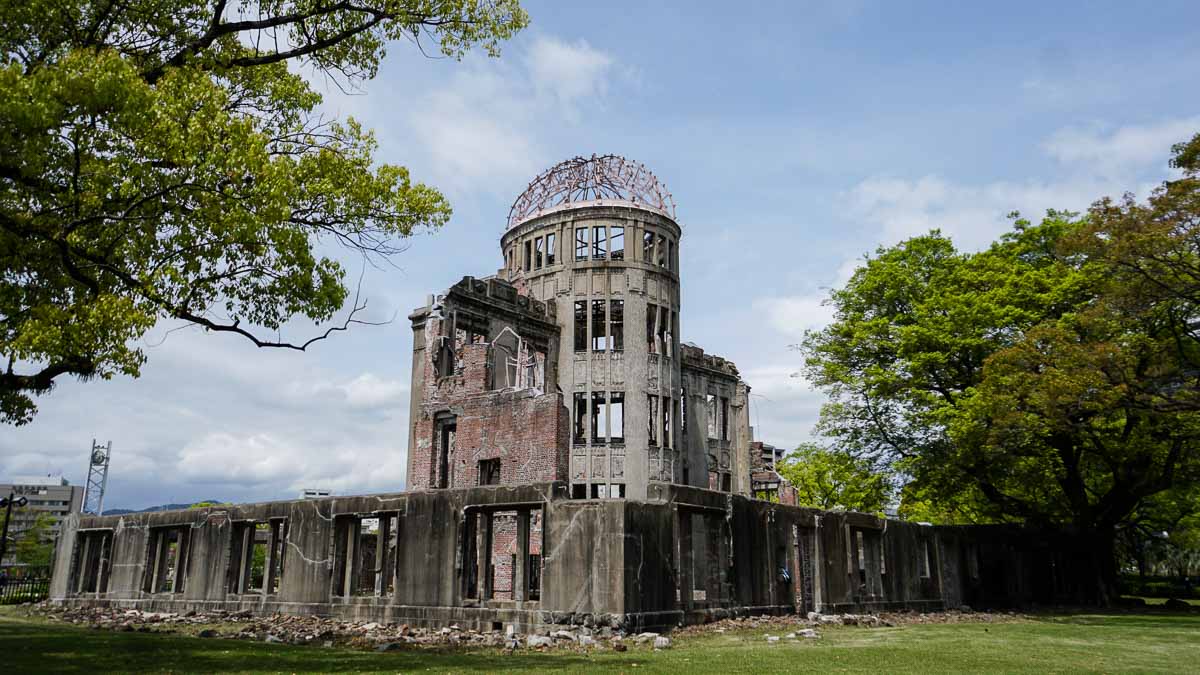
Peace Memorial Museum (¥200) — As the first city in the world to be attacked by a nuclear bomb back in 1945, the city’s dark past has been the main draw for visitors from around the world.
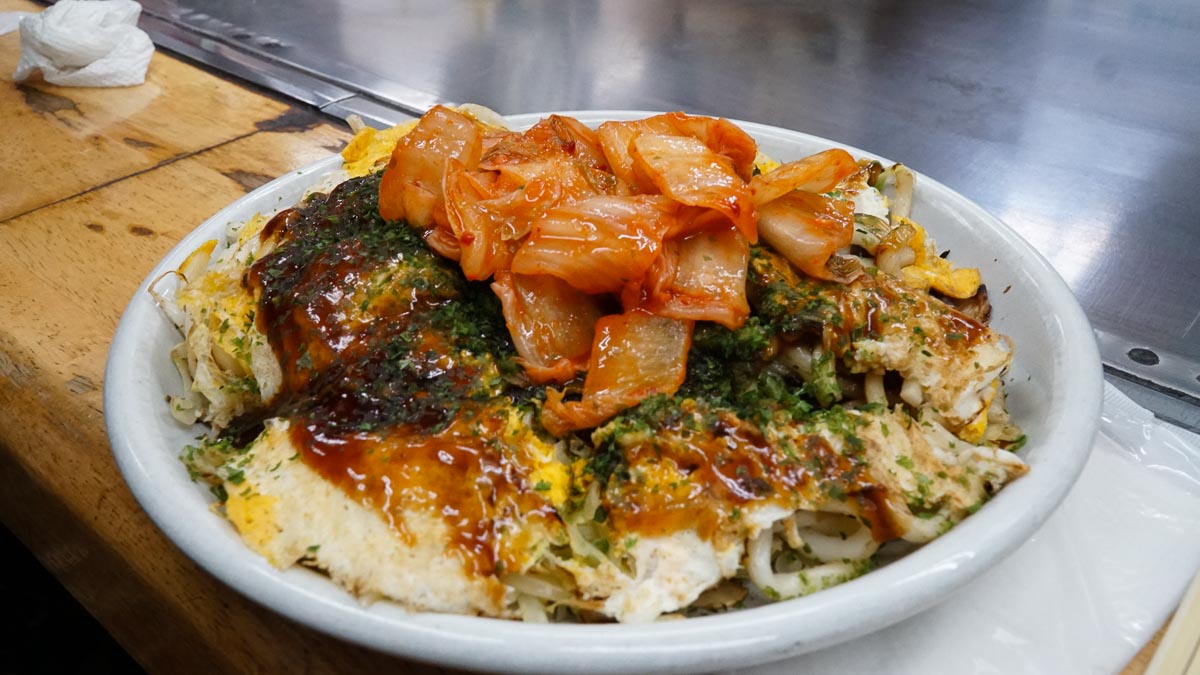
Okonomi-mura (¥810) — Hiroshima is also known to have some of the best okonomiyaki. Does Osaka or Hiroshima do it better? Let us know!
Day 25–30: Kyushu
When to use the JR Pass:
– Hiroshima Station (Tokaido-Sanyo Shinkansen towards Hakata) – Kokura Station
– Kokura Station (Sonic-Nichirin towards Miyazaki-Airport) – Beppu Station
– Beppu Station (Sonic-Nichirin towards Hakata) – Kokura Station
– Kokura Station (Kagoshima Line towards Omuta) – Hakata Station
The southernmost of the four principal Japanese islands, Kyushu is widely regarded for its hot springs and sand baths in Beppu, said to promote blood circulation.
Kokura Highlights:
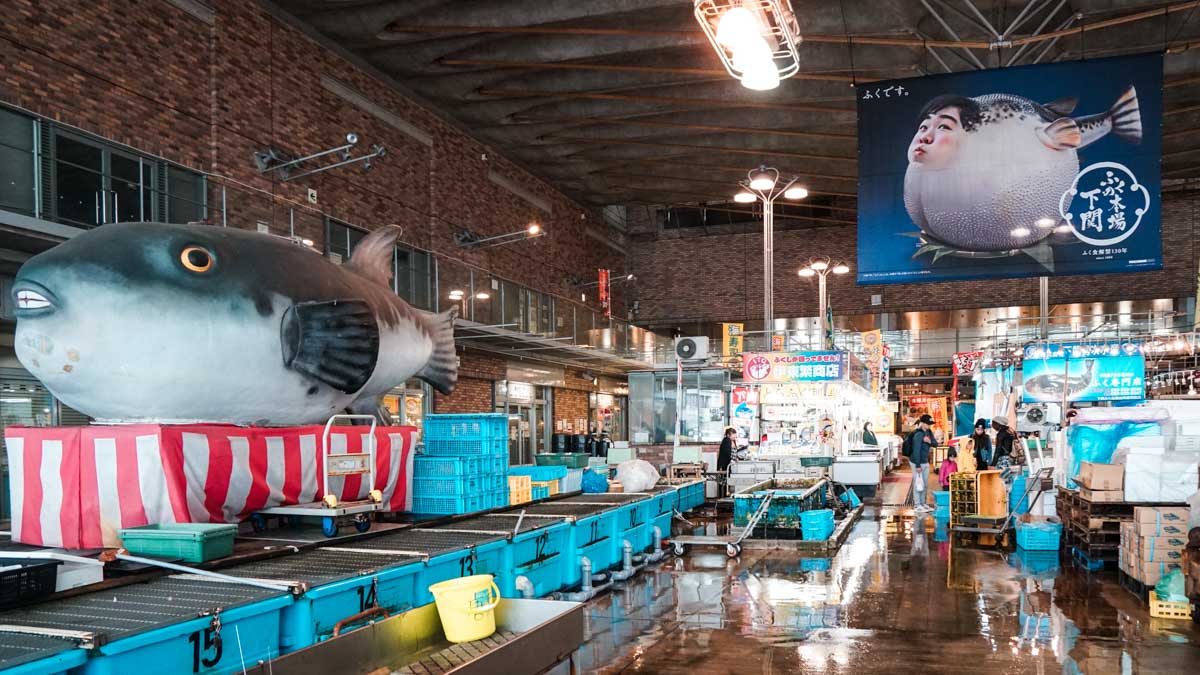
Shimonoseki — the port city best known for its export of the notoriously poisonous pufferfish delicacy, fugu.
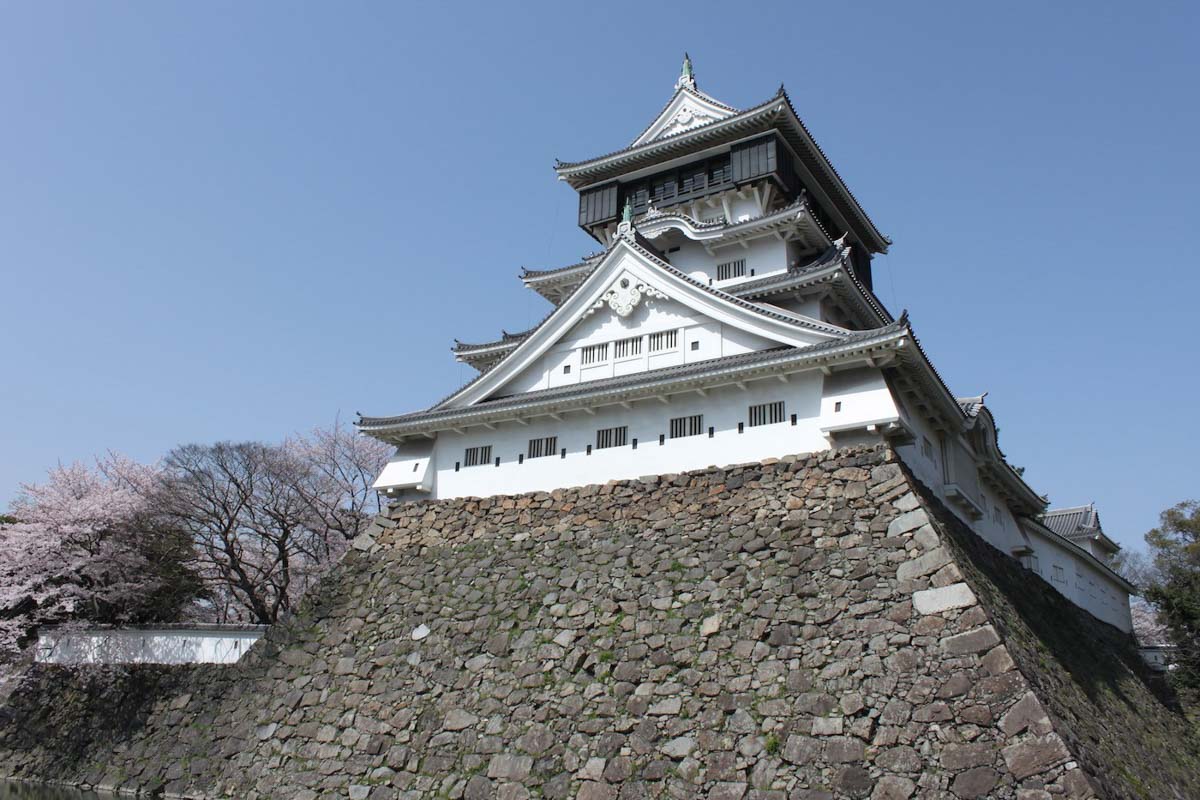
Kokura Castle (¥300) — the last standing castle in Fukuoka (pictured above).
Beppu Highlights:
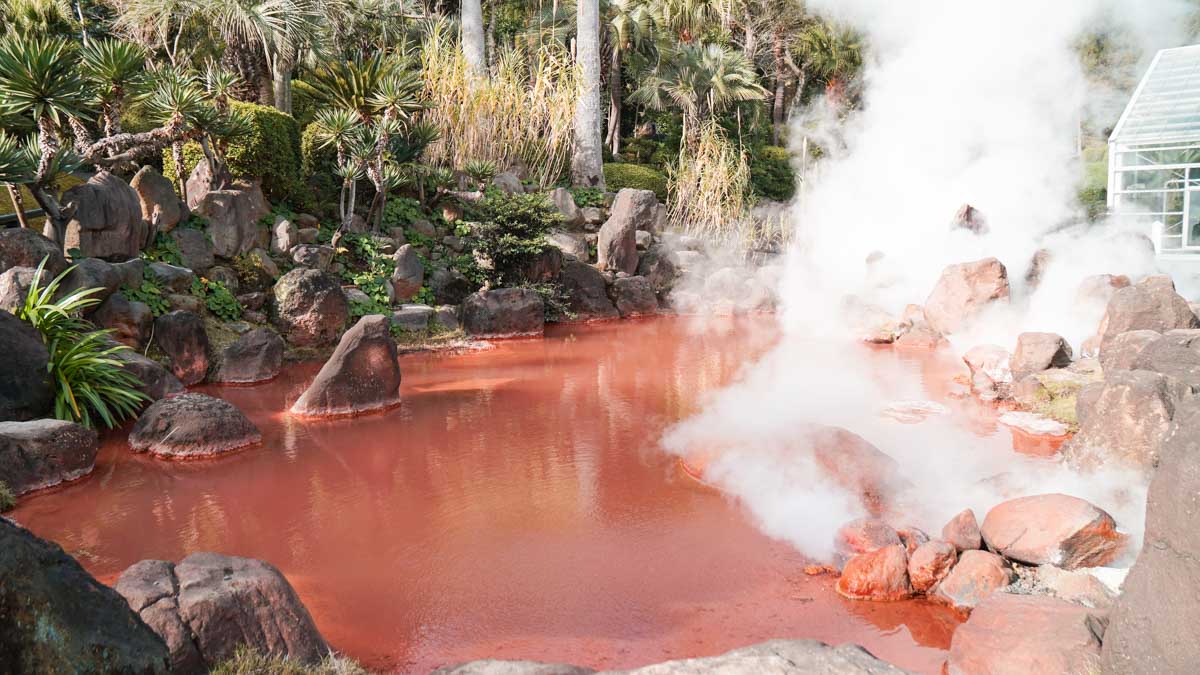
Hells of Beppu — Made up of natural hot springs found around the Kanawa and Shibaseki districts, the Hells of Beppu (above) is the most famous attraction here.
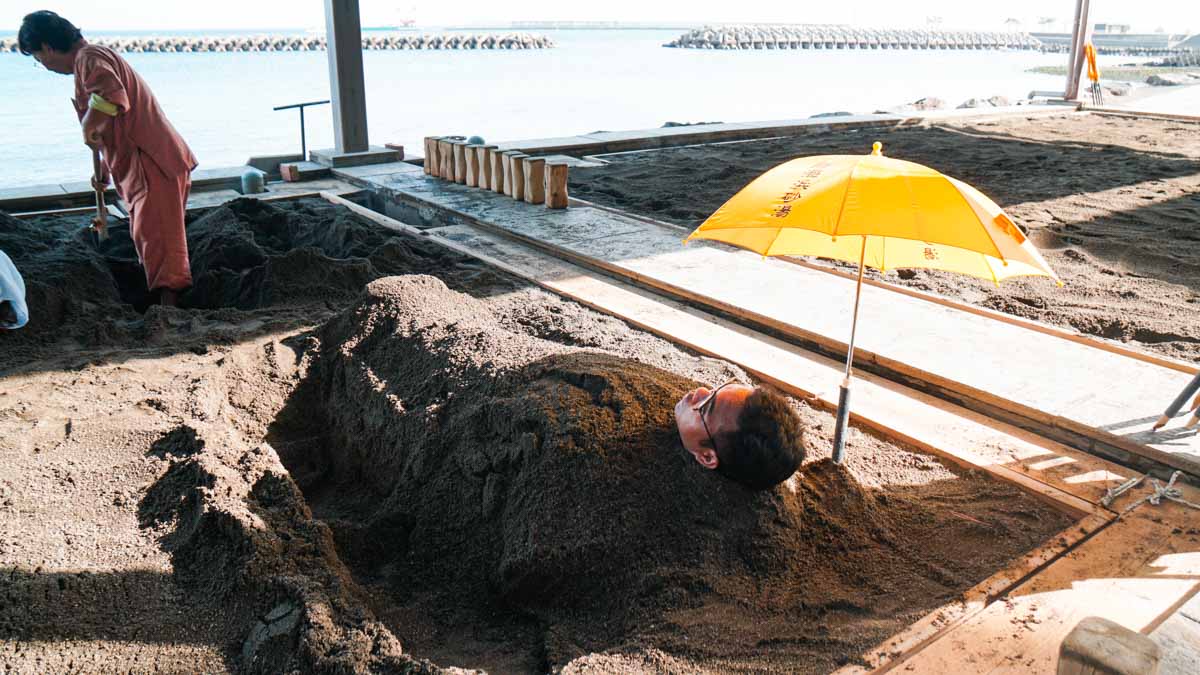
Beppu Sand Baths (¥1,030) — While it looks like your typical weekend hanging out at East Coast Beach, the heat from the volcanic sand is said to relieve body aches and help stimulate blood circulation.
Fukuoka Highlights:
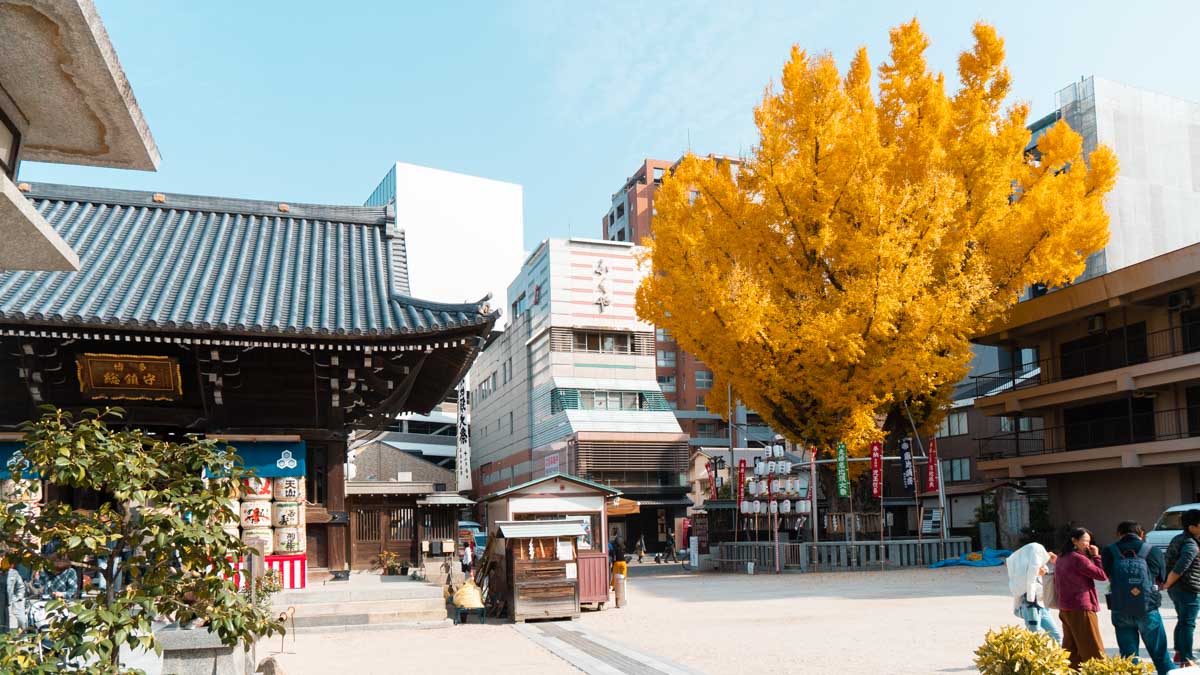
Kushida Shrine — the oldest and most important shrine in Fukuoka. In the autumn, an impressive sight awaits: a millennia-old Gingko tree symbolising longevity turns a vibrant yellow!
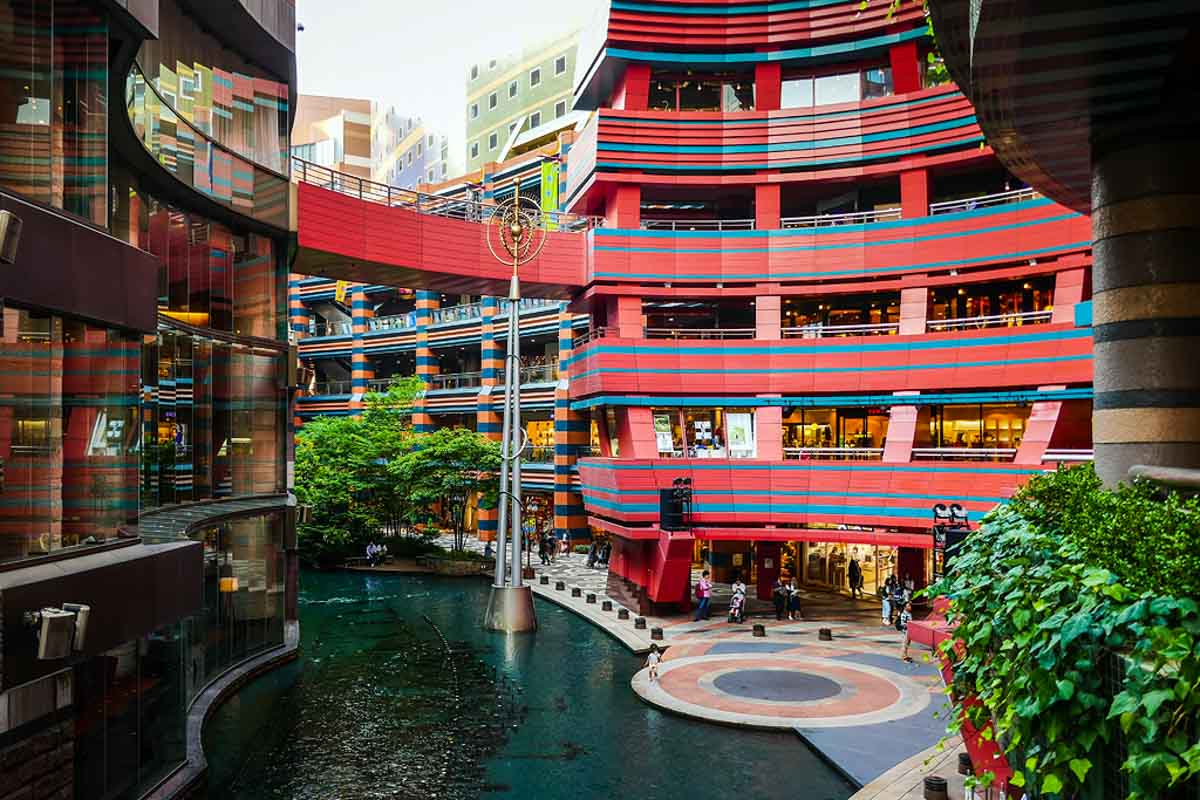
Canal City Hakata — Built around an artificial canal, Canal City has so many shops (over 250 shops and dining spaces) that it has earned the title of being a “city within a city”. It’s truly a one-stop-shop for every tourist’s needs!
Where to Stay for 30 Days in Japan
Sapporo
2 Nights – Yasube (~S$30) / Sappolodge (~S$32)
1 Night – Hakodate Kokusai (~S$33)
1 Night – Hotel Sonia Otaru (~S$34)
Tokyo
4 Nights – Asakusa Smile (from S$19.40) / Grids Tokyo (from S$25.70)
1 Night – Hakone Tent (~S$42.44)
Mount Fuji
1 Night – Kawaguchiko Station Inn (~S$28.30)
1 Night – Fujiichikan Hut (~S$81.30)
3 Nights – K’s House Fuji View (from S$31.53)
Kyoto
4 Nights – Guesthouse YULULU (~S$24.25)
Osaka
3 Nights – J-Hoppers Osaka (~S$27)
Hiroshima
2 Nights – J-Hoppers Hiroshima Hostel (~S$27)
Kitakyushu
2 Nights – Ark Blue Hotel (~S$30)
Fukuoka
4 Nights – The Gate Hostel (~S$24)
Save up to ~S$368 with the JR Pass
With this itinerary, travelling from Sapporo to Kyushu via individual train rides will easily cost you up to a whopping ¥88,880 (~S$1,087) including reservations. Compared to regional JR passes and single trip tickets, you can reserve seats at no charge with the Whole Japan Rail Pass. This comes in exceptionally handy on long-distance trains (e.g. 7.5 hours from Sapporo to Tokyo), where you’d want to sit with the people you’re travelling with. They also happen to be the most expensive journeys, allowing you to save more with the pass.
With the 21-day JR pass going for S$706 on Klook, your total savings amount to ~S$381. That’s almost enough to book you a night at the Four Seasons! Oh, and don’t forget the extra perks like free Ekirin bicycle rentals around Japan. Check out our JR Pass Guide to discover all the benefits with this pass.
Purchase Your JR Pass in Singapore
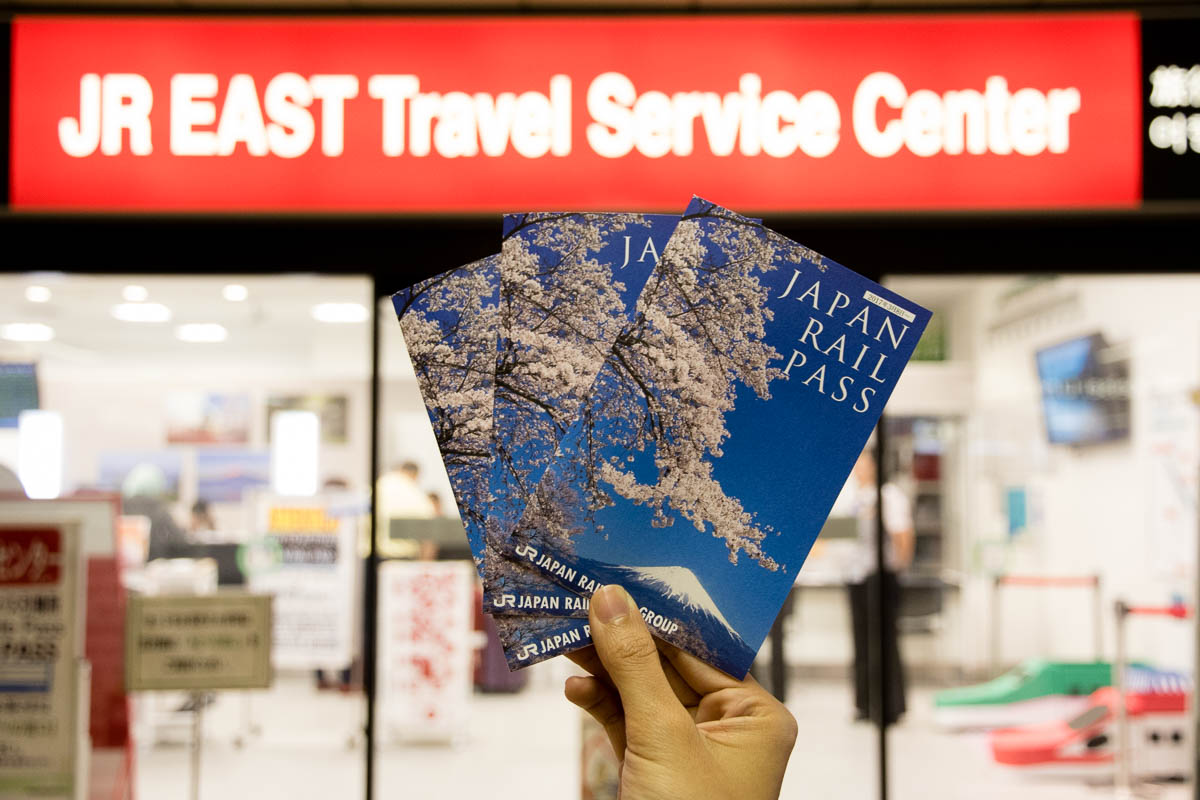
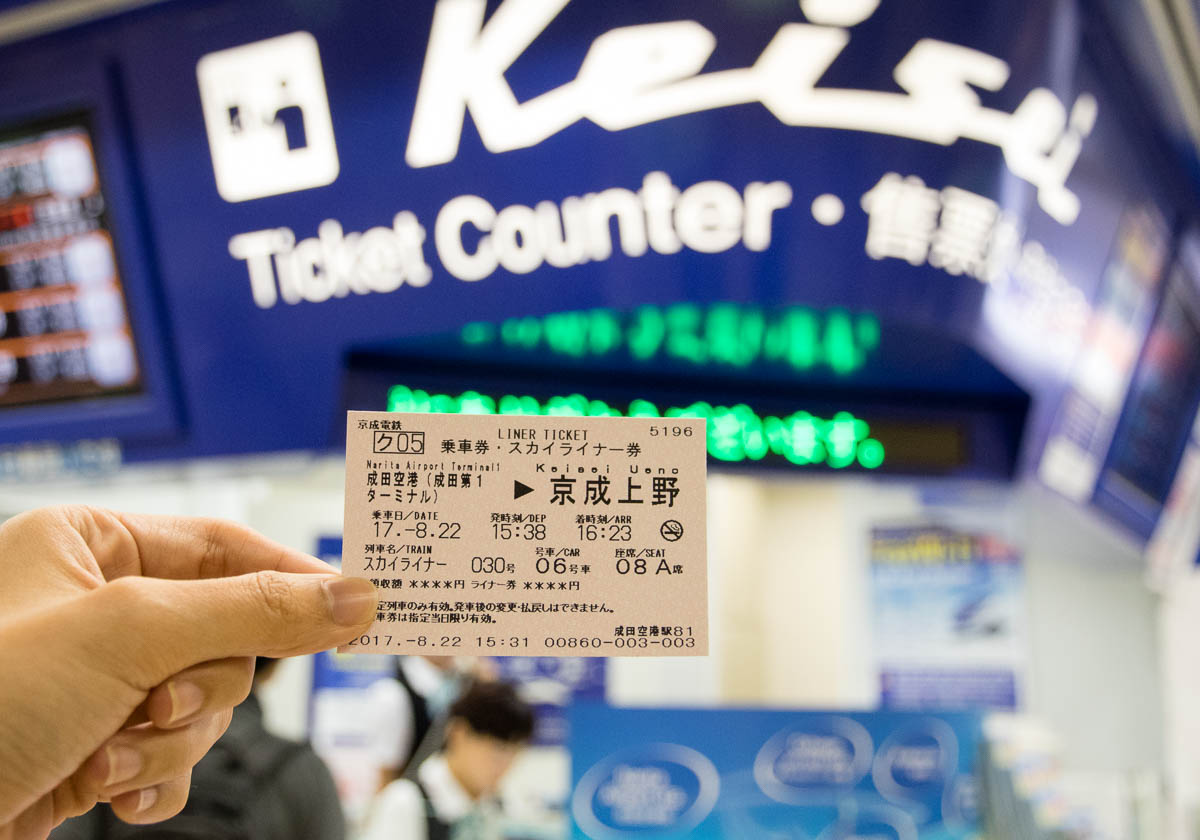
Pre-order your passes online via Klook for cheaper tickets — they’re the cheapest in Singapore and definitely cheaper than getting from Japan. The exchange voucher will be delivered to your doorstep via registered mail within 7 working days.
Once you arrive in Japan, prepare your passport and exchange voucher before heading to the nearest JR Travel Service Centre. There’s usually one at the airport but also major stations like Tokyo and Shin-Osaka station. You’ll be asked when you’d like to activate the pass, so you can collect it first and have it start later in the trip.
PROMO: Receive a S$30 Klook Voucher when you purchase any Whole Japan JR Pass (7, 14 or 21 days) before 31st December 2019
General Budget Tips
Transport
With the exception of the blazing hot weather in Singapore, I’m a pretty huge advocate for walking as a mode of transport. Especially when you’re wandering through a foreign city, it’s the best way to take in the sights and simply be present. This is where storage lockers at train stations come in handy, particularly if you haven’t checked in to your next accommodation.
To get around a little quicker, cycling around the city is pretty common as well. That being said, I wouldn’t spend days getting from Osaka to Tokyo on a bike — they’ve got bullet trains for that. Instead of purchasing tickets for each bullet train, opt for the multi-day nation-wide JR pass (7, 14 or 21 days).
This pass grants you unlimited rides on almost all JR trains and shinkansen (excluding “Nozomi” and “Mizuho” trains). That can potentially save you a good sum as previously mentioned!
Food
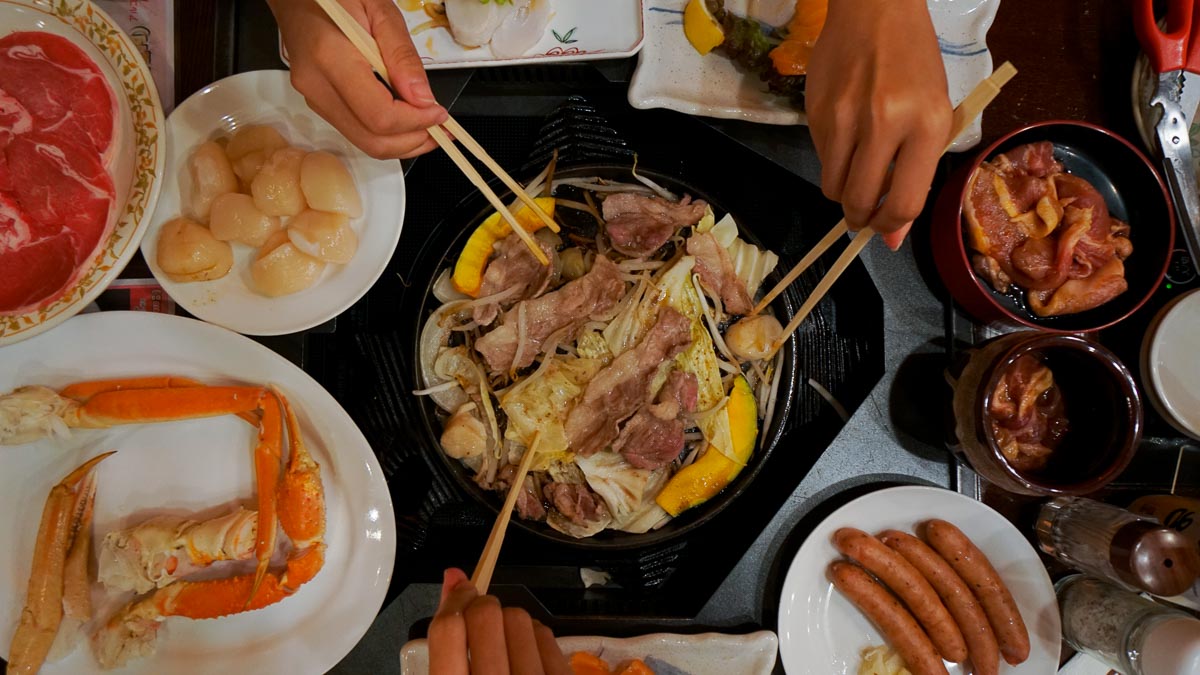
 Without having to binge on cup noodles for 30 consecutive days and exceed a lifetime’s worth of sodium intake, surviving on a food budget of S$15 is possible. You can get a decent breakfast under ¥300 (~S$3.60) at local convenience stores (FamilyMart, 7-11 or Lawson) and also have (healthier) fast food under S$5 at joints like Yoshinoya and Matsuya. And let’s not forget budget conveyer belt sushi from ¥100 a plate!
Accommodation
Like every other backpacker, you’re constantly on the move. While it’s a luxury to have a room with a view of Mount Fuji, you don’t actually spend that much time awake in your accommodation. Most of the time, all we need is a place to sleep.
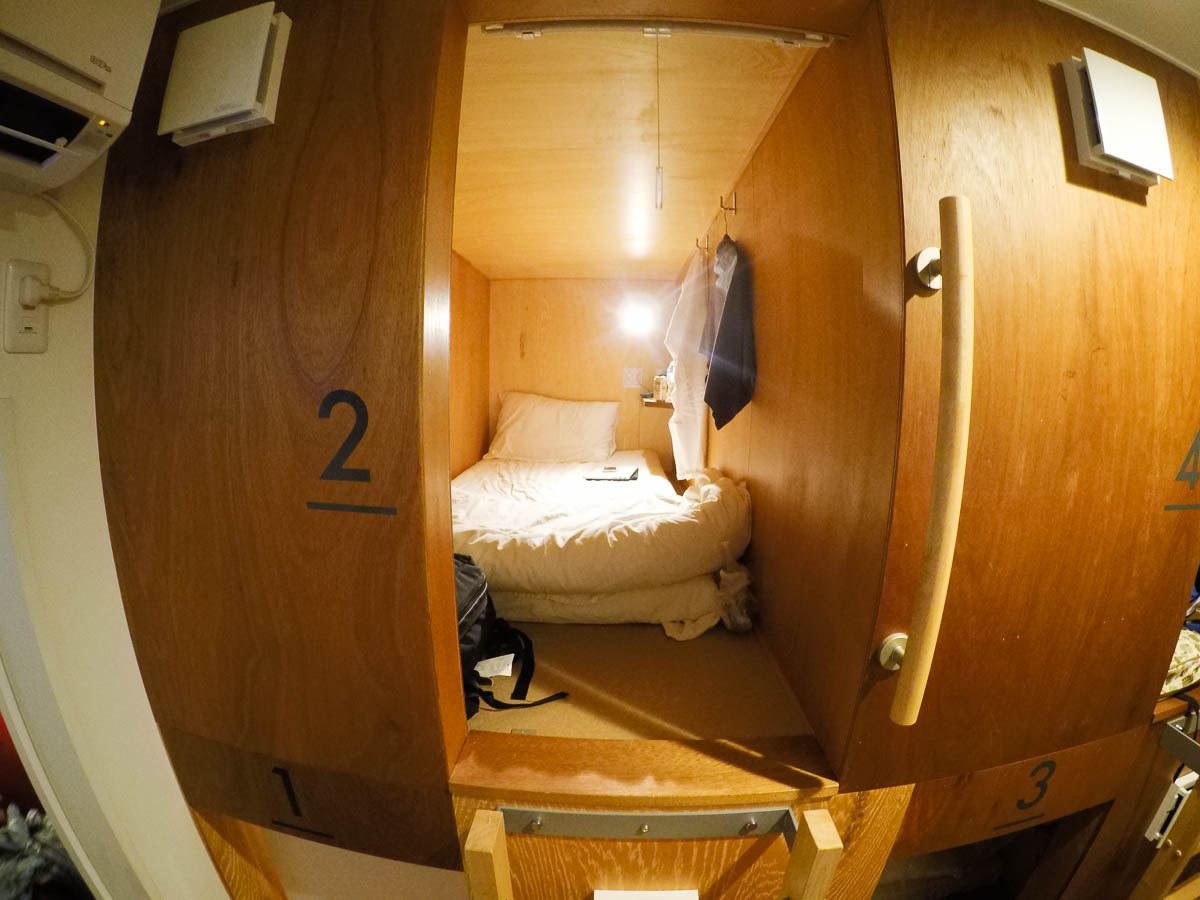
Hostels in Japan aren’t the cheapest around, but they’re definitely the more affordable option averaging S$30/night. Look out for those offering free breakfast! It might not be a fantastic spread, but hey, beggars can’t be choosers. And now you can spend a little extra on a dinner upgrade without bursting your budget (too much)!
Activities
Book your travel essentials via Klook for a peace of mind. From SIM Cards/Wifi Devices, to City Passes and Entrance Tickets, it’s cheaper and more convenient to book ahead of time.
Check Flight Prices to Japan
What’s your favourite city in Japan? Let us know in the comments!
This post was brought to you by Klook.
Like what you see? Follow us on Facebook, Instagram, and YouTube for more travel updates!
https://www.instagram.com/p/BuOT5TqBtIT/?utm_source=ig_web_button_share_sheet

 — Universal Studios Japan")


")


