Climbing Mount Kinabalu is surprisingly manageable for beginners despite being over 4000m in height. Here’s everything we wished we knew before planning this multi-day trek!

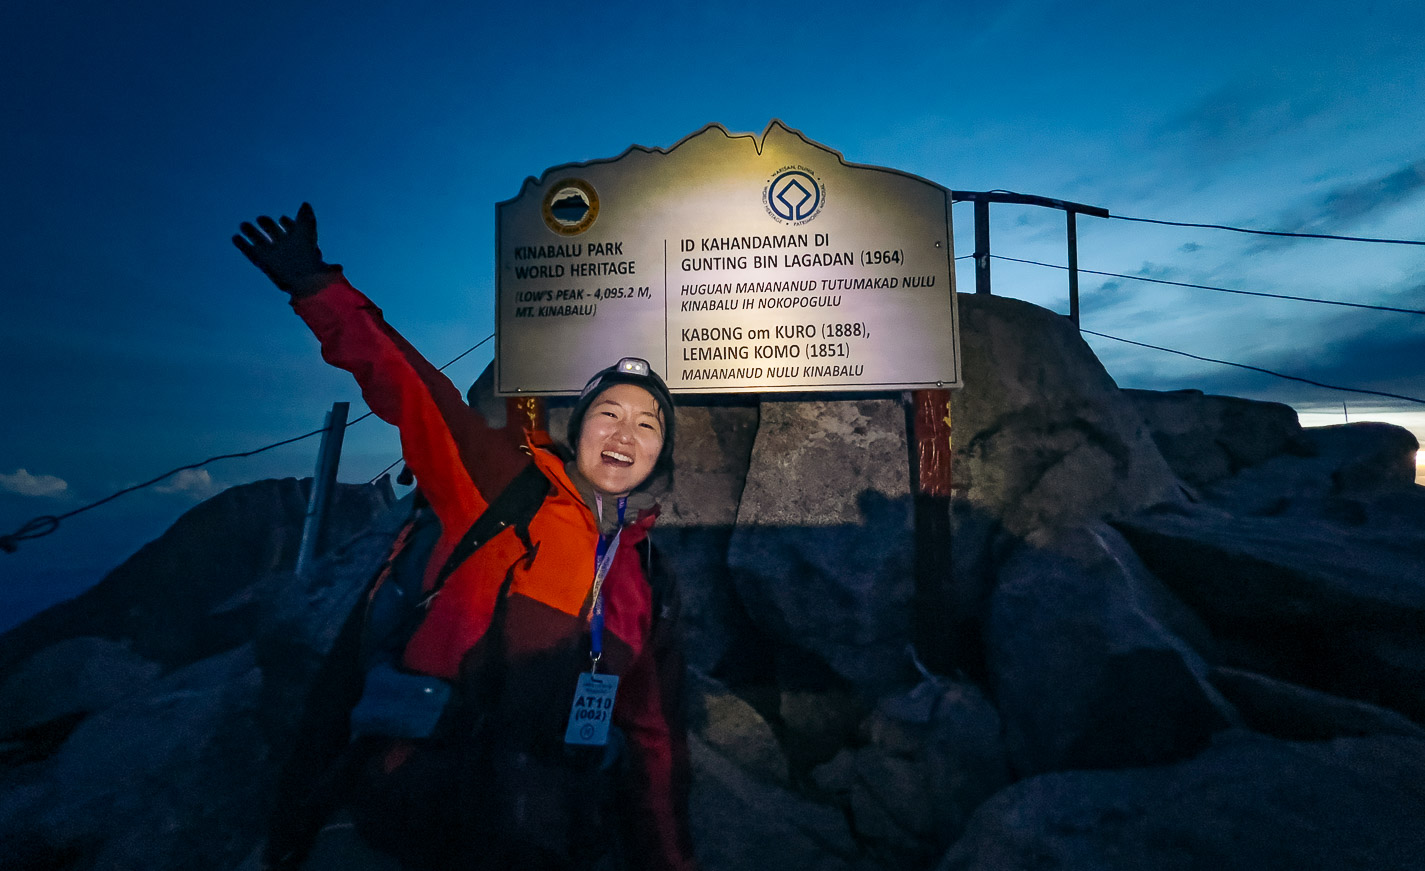
Standing at the top of Mount Kinabalu: My grandma in the 1990s versus me in 2023.
Climbing Mount Kinabalu (4,095m) has been on my bucket list for as long as I can remember. Several of my family members have done it, including my grandma. In fact, she’s summited it more than once. The last time was when she was in her 50s!
The point is, despite its imposing status as Malaysia’s tallest mountain, Mount Kinabalu is a pretty doable multi-day hike in Southeast Asia for beginners.
Photo credit: @bryan_hys via Unsplash
If climbing Malaysia’s tallest mountain is on your bucket list too, this Mount Kinabalu guide should be useful as it’s everything I wished I knew before planning my trip!
How to get to Mount Kinabalu
Mount Kinabalu is located in the state of Sabah in East Malaysia. The best way to get there is to fly to Kota Kinabalu (Sabah’s capital) — a 2.5 hour direct flight from Singapore!
From Kota Kinabalu city, it’s a 2.5 hour drive to the Kinabalu National Park in Kundasang. But you don’t have to worry about booking transport as round-trip transport is usually included in a Mount Kinabalu tour package!
Read also: 20 Things to Eat-See-Do in Sabah’s Capital Besides Climbing Mount Kinabalu
Before booking your climb trip to Mount Kinabalu
Book your tour at least four months in advance
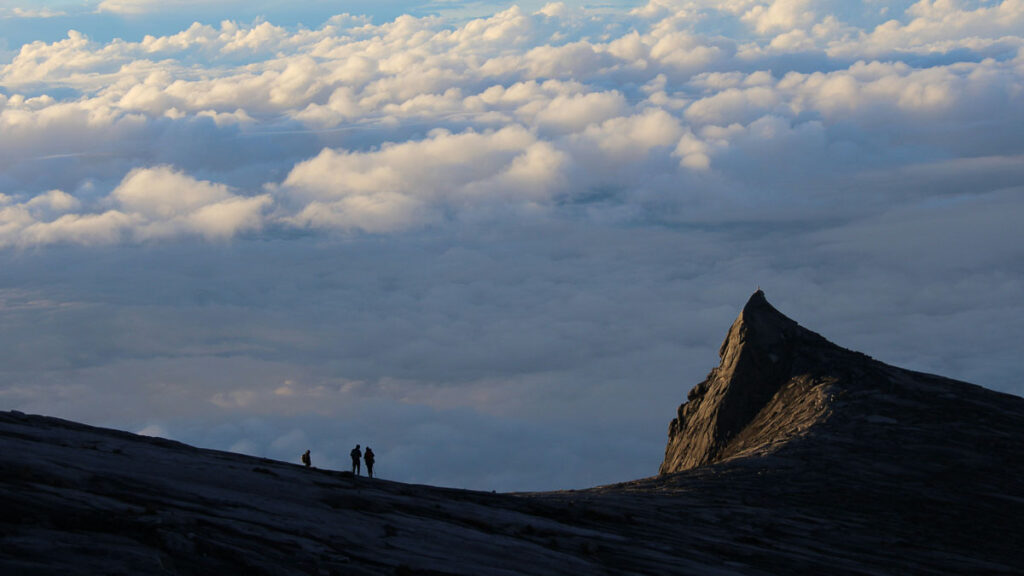
Photo credit: @glitterly_app via Unsplash
To climb Mount Kinabalu, you’ll need a climbing permit and a guide. You’re not allowed to climb without either! As of 25 Jan 2023, hiking permits are limited to around 163 per day, so it’s recommended to book your tour at least four months in advance.
A minimum of two days (one night) is required for the trip — the park stopped issuing one-day climb permits in 2015. Some trekkers opt for a three-day package (two nights) to acclimatise better and increase chances of summiting. We opted for the basic two-day package and prayed that the weather would be fine!
I learnt later on that if there’s rain after 1:30AM, Sabah Parks Authority will close the gate to the summit and hikers won’t be allowed to attempt the hike due to safety reasons. The summit climb terrain is mostly barefaced rock, with no trees so heavy rain essentially turns it into a big waterfall. Two hikers in my hostel said it was their third summit attempt, due to poor weather.
Decide whether you’re doing the Via Ferrata
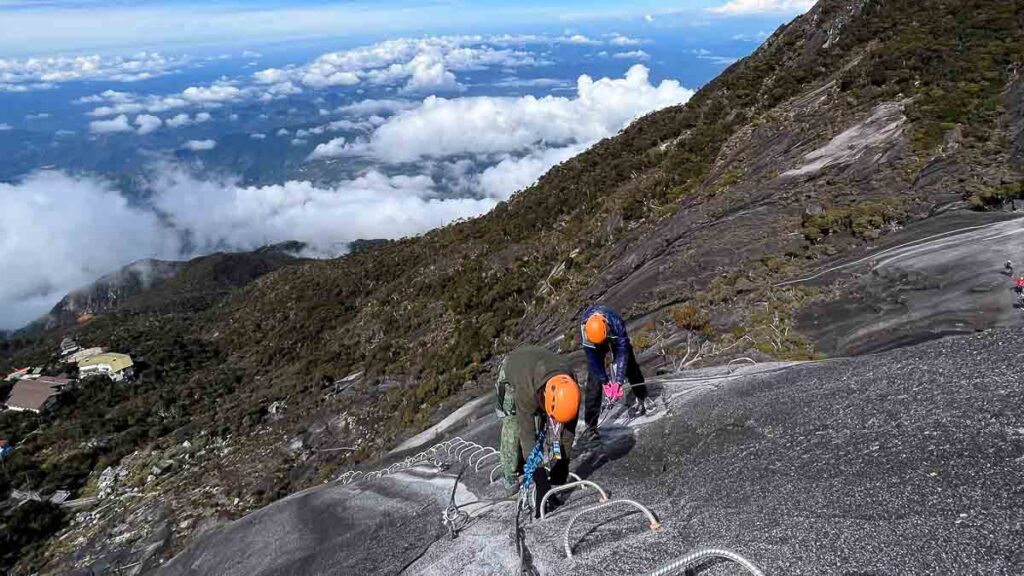
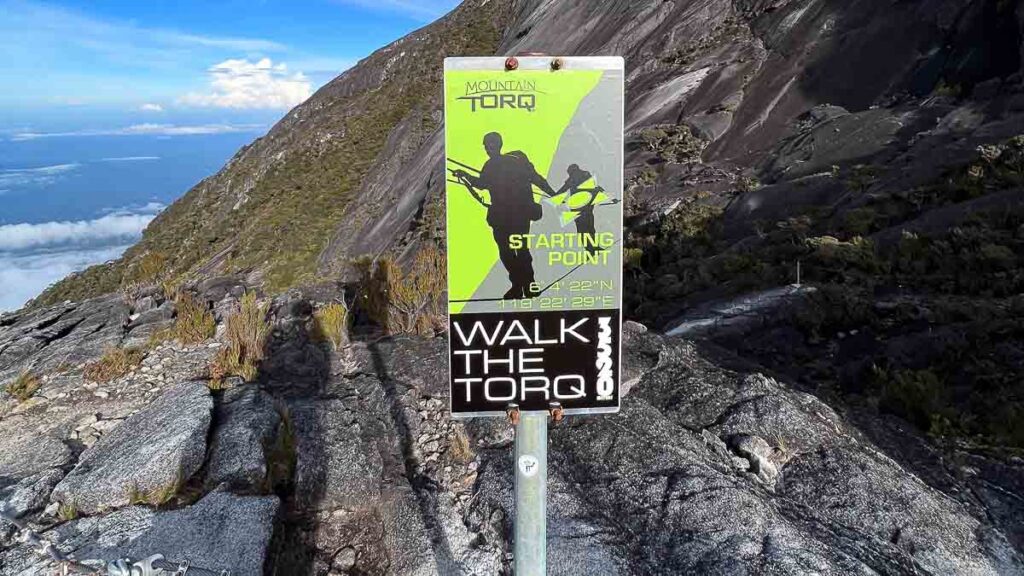
The Walk the Torq Circuit I did!
Once you’ve decided on the number of days, the next thing to consider is whether you’ll be doing the via ferrata. A via ferrata is a climbing route in the mountains that uses cables, rungs and ladders — basically an obstacle course at a higher altitude.
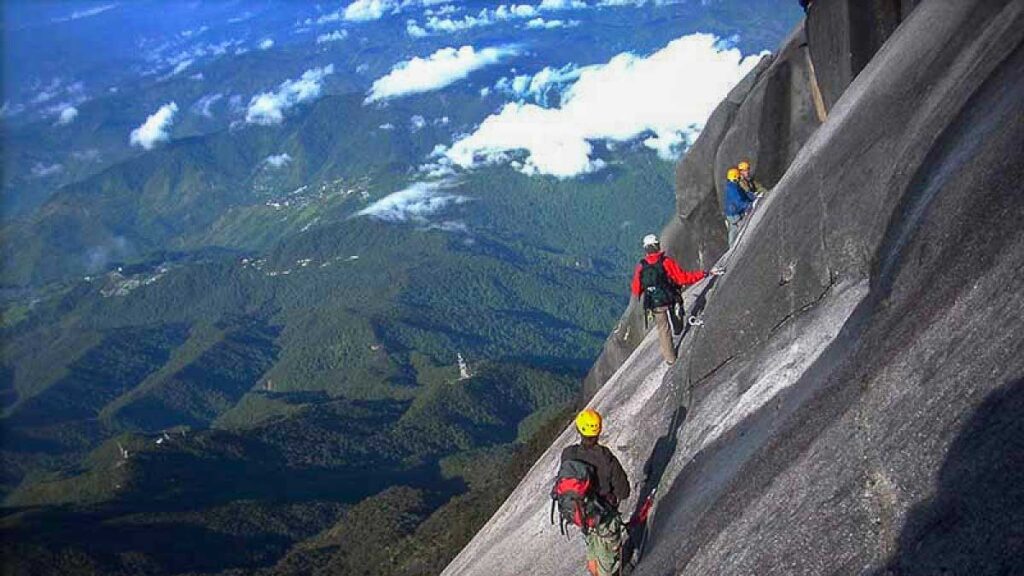
Low’s Peak Circuit. Photo credit: Amazing Borneo
Mount Kinabalu has two via ferrata routes — Walk the Torq (beginners, 1-2 hours) and Low’s Peak Circuit (intermediate, 3-4 hours). Low’s Peak holds the Guinness World Record as the world’s highest via ferrata, at an altitude of 3,776m. As I’d never experienced a via ferrata before, I opted for Walk the Torq. More on my experience later!
If you’re planning to take on the via ferrata; take note of cut-off timings:
— Reaching base camp by 4PM on day one for a compulsory safety briefing
— Summit and reach the meeting point to begin the via ferrata course. No refunds will be given if hikers fail to arrive on time and miss the activity.
Via Ferrata Cut-off Timings
Walk the Torq: 7:15AM
Low’s Peak Circuit: 6:40AM
There were a couple of people who signed up for Low’s Peak Circuit and didn’t reach on time, but the guides allowed them to do the Walk the Torq instead which had a later cut-off time.
Mount Kinabalu Climb Packages
| 2D1N Mount Kinabalu | 2D1N Mount Kinabalu with Via Ferrata (Walk The Torq) | 2D1N Mount Kinabalu with Via Ferrata (Low’s Peak) | |
| Borneo Calling | RM2,400/pax (~S$682) | RM2,950/pax (~S$839) | RM3,250/pax (~S$924) |
| Amazing Borneo | S$747/pax | S$909/pax | S$1,012 |
| MountKinabalu.com | RM2,540/pax (~S$721) | RM3,090/pax (~S$877) | RM3,440/pax (~S$977) |
*Prices are based on a group of four for the 2024 climbing season — it’ll be cheaper if you have a bigger group! Tours include permits, entrance fees and mountain guide fees which are payable to Sabah Parks as well as all meals, transportation and accommodation.
If you’re wondering if there’s a big difference between tour operators, there isn’t. The accommodation and food provided is the same, and there’s no difference in route or timing. But you’ll likely have to inquire with a few tour operators to see who has available spots!
Arriving at Kinabalu Park HQ
Getting to Kinabalu Park HQ
The day starts early — pick-up from Kota Kinabalu city centre is usually at 6AM and most hikers should reach Kinabalu Park HQ by 9AM.
Collecting Your Permit and Lunch, Luggage Storage and Hiring Porters
At Kinabalu Park HQ, you’ll meet your assigned guide who’ll provide your hiking permit. It’s in the form of a lanyard that you must wear throughout the hike and show at certain checkpoints — so don’t lose it! We also collected a simple packed lunch with 500ML bottled water.
If you’ve got extra luggage, there’s the option to store it at Kinabalu Park HQ for RM12/bag (~S$3.40). For those who want to hire a porter, it costs RM15/kg and the maximum weight per bag is 10kg. Take note that porters don’t trek with you, and instead hike ahead to base camp — so ensure all the items you need for the hike (like water) is with you.
It’s only a one-night stay for most hikers so it’s possible to carry your own bag up, provided you don’t bring unnecessary items. I’ve compiled a Mount Kinabalu packing list at the end!
Day 1: Timpohon Gate (1,866m) to Panalaban Base Camp (3,290m)
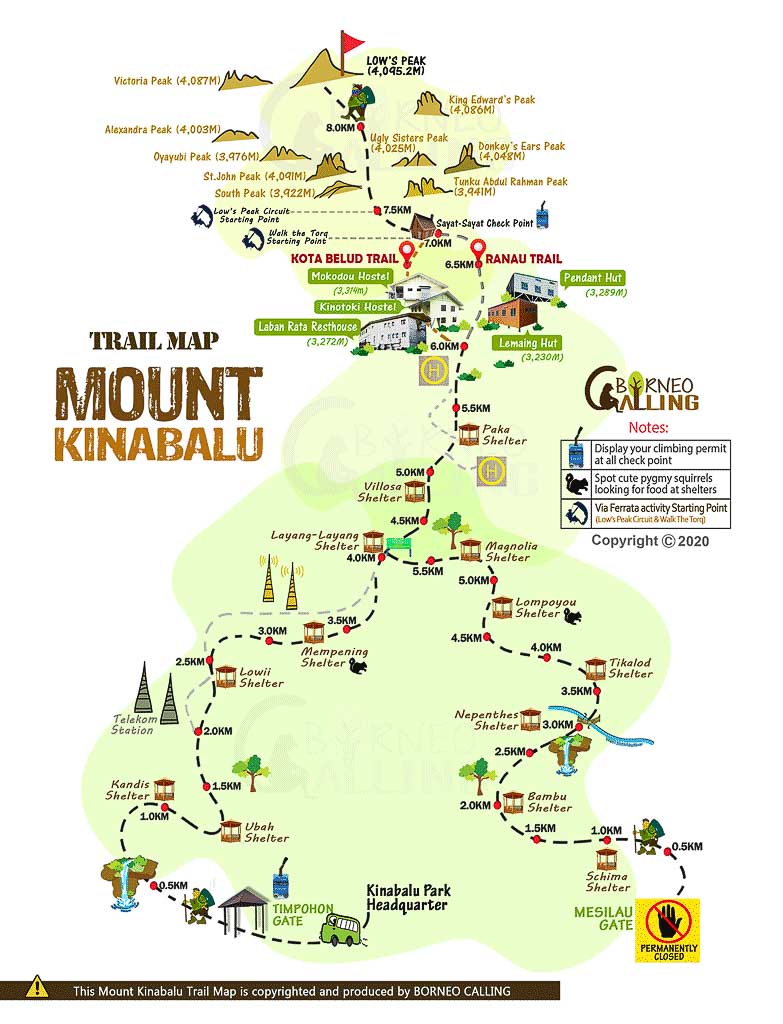
Photo credit: Borneo Calling
Distance: 6km
Duration: 4 – 7 hours
Temperature: 18°C – 24°C
After settling everything at Kinabalu Park HQ, it’s a short drive to the official start point of the hike, Timpohon Gate (1,866m). Going at a pretty steady pace with several breaks, we started our hike at 9:30AM and arrived at Panalaban Base Camp at 3PM.
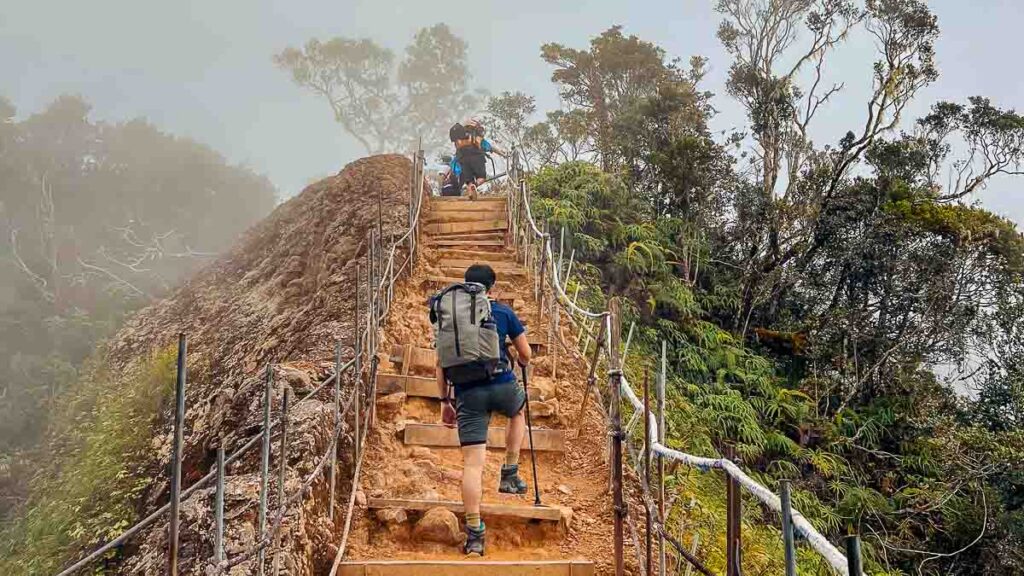
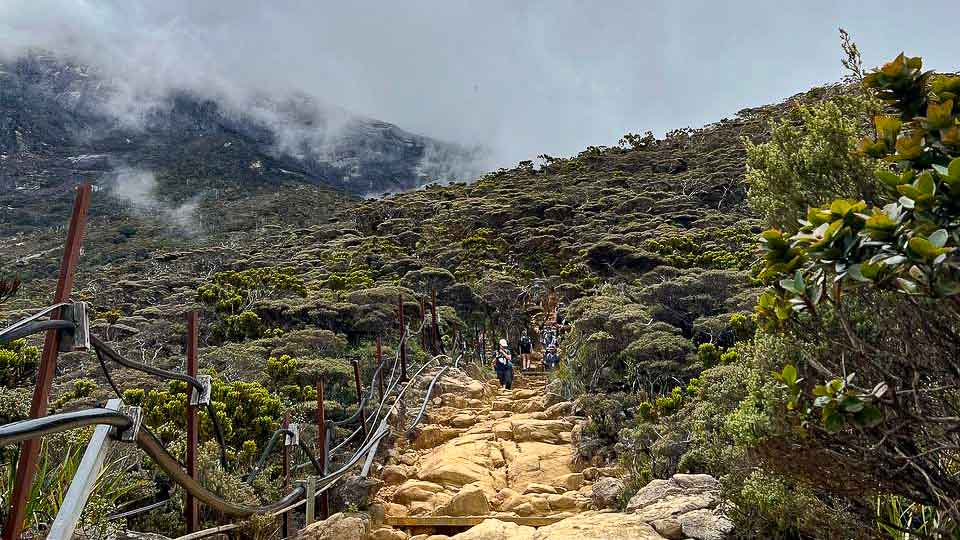
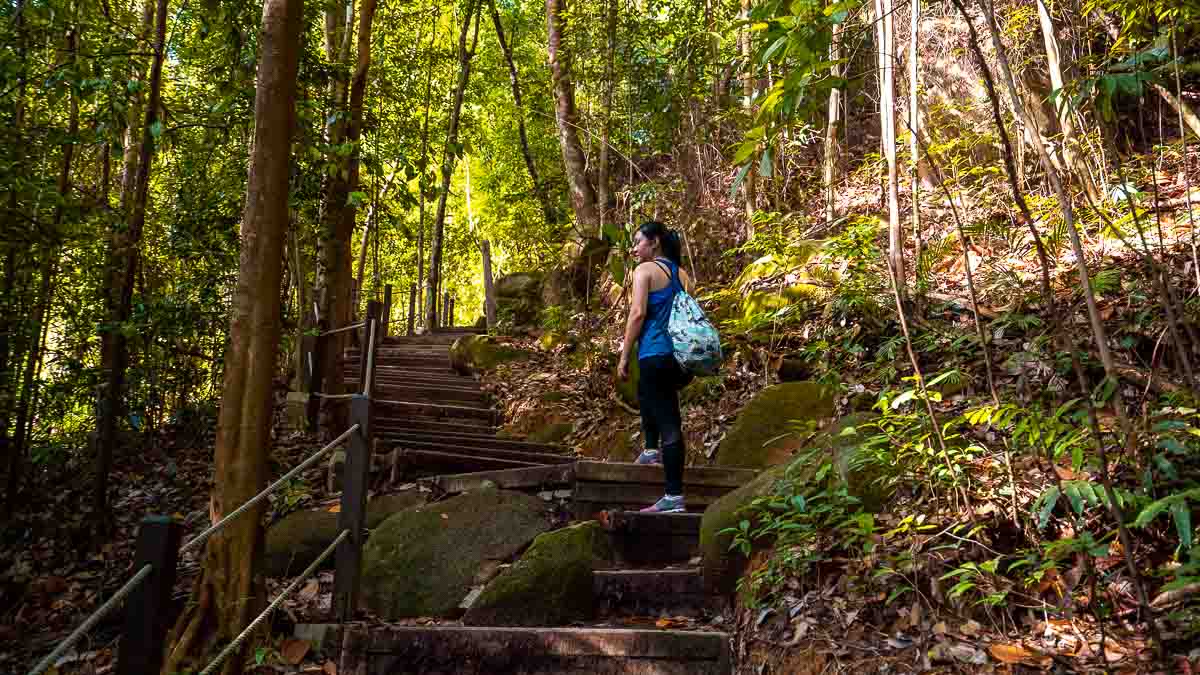
The first section is like several Bukit Timah Hills stacked on each other — many, many stairs. It’s a lowland rainforest terrain, so there’s many trees and not much of a view from the start point to base camp.
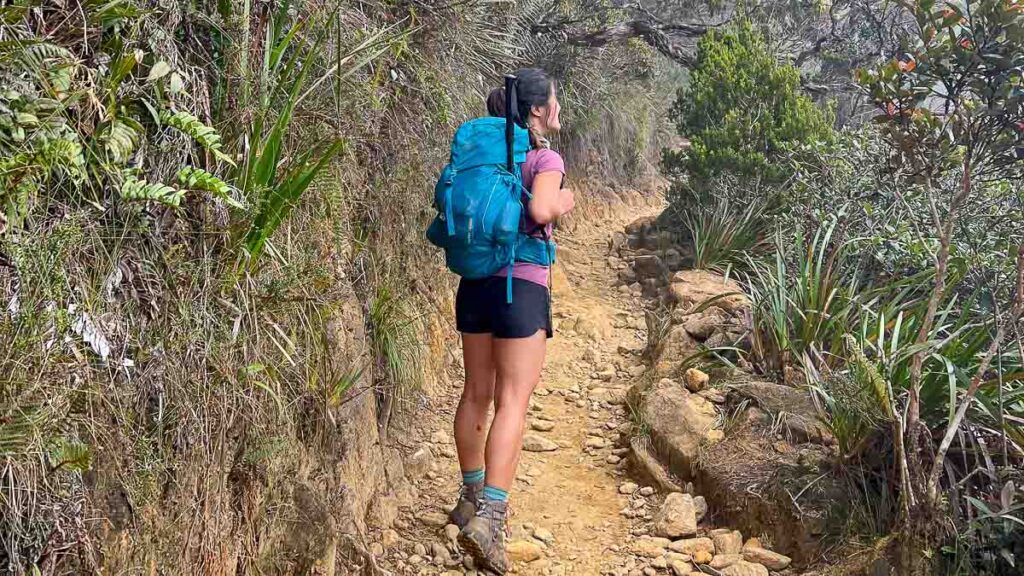
On day one, I wore a dri-fit shirt and shorts, which was perfect! The temperatures at this point ranges from 18°C to 24°C, comfortable weather for hiking.
I was pleasantly surprised to find that there’s a sheltered rest stop with a toilet every 1km or so. Just bring your own tissue paper and hand sanitiser because there’s no running water available.
We had lunch about 2.5 hours into the hike at one of the rest stops. It’s typically a simple meal — some sandwiches, hardboiled eggs and fruit.
*Pro-tip: Bring your own snacks for the journey!
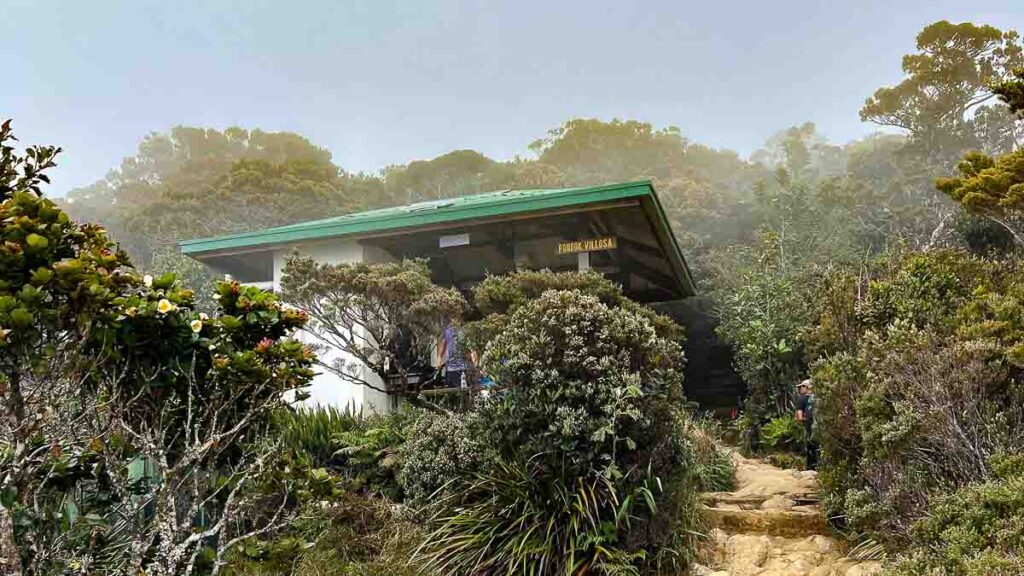
Overnight at Panalaban Base Camp (3,290m)
Accommodation
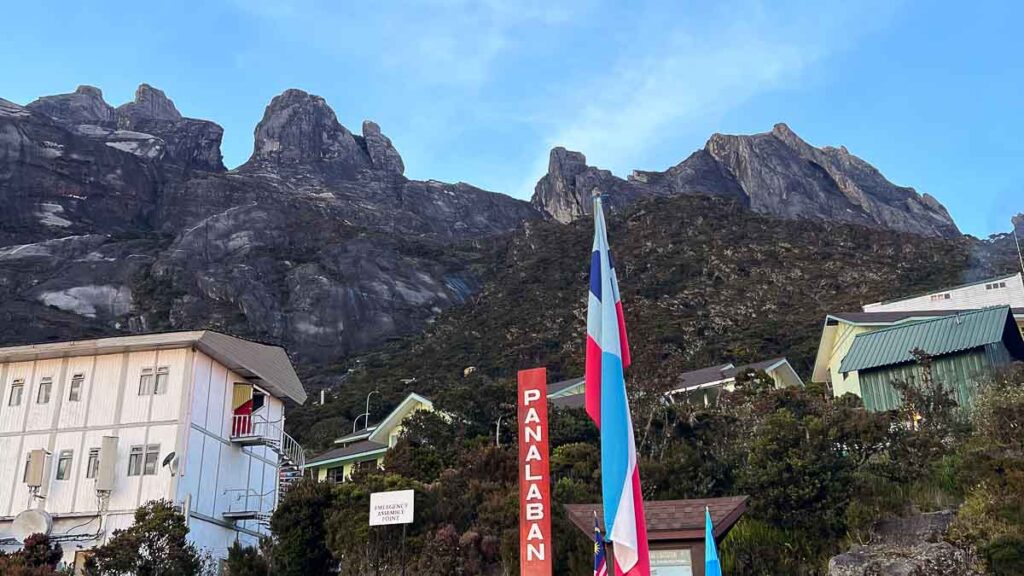
Panalaban Base Camp is the midpoint of your Mount Kinabalu adventure, where all hikers stay overnight before attempting the summit hike early the next morning. There are four basic mountain huts here and they aren’t heated, but blankets are provided. Hot water is limited so be prepared to have a cold shower.
*Pro-tip: Shower before dinner as it gets pretty cold once the sun sets!
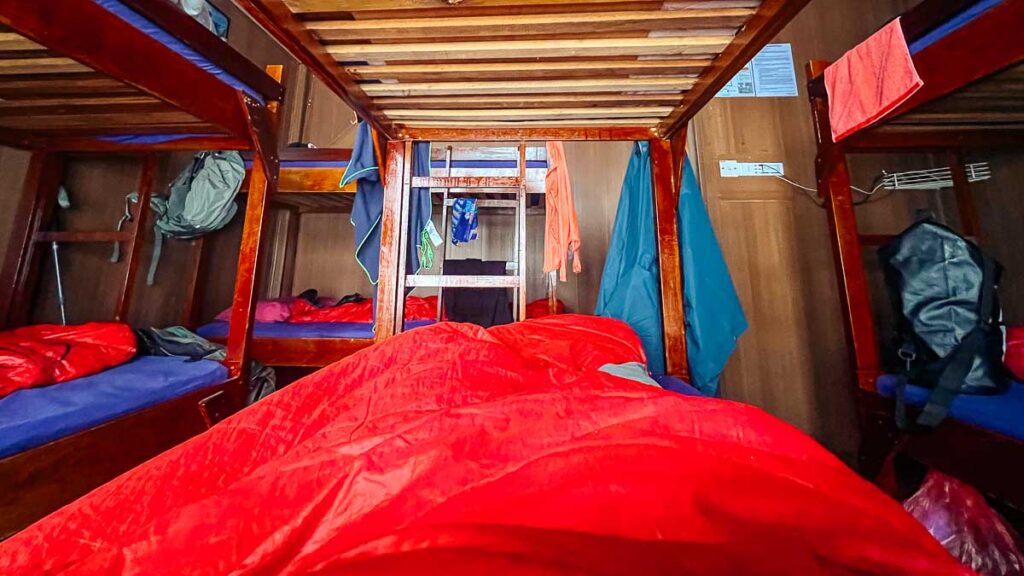
1) Pendant Hut (3,289m)
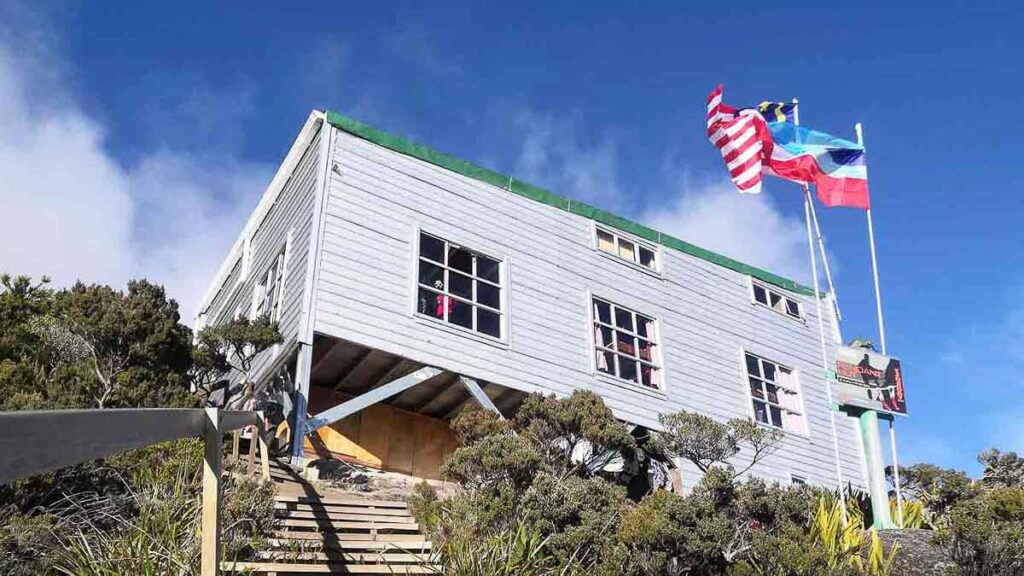
Photo credit: Borneo Calling
A hut exclusively reserved for via ferrata climbers so we stayed here. It’s the highest hut and closest to the summit gate — just a minute walk away. You’ll also find the world’s highest post box here, where you can drop a postcard!
Each bunk includes a mattress and sleeping bag (the only accommodation that provides it!); which was comfy and warm. There’s a common bathroom with five sinks, three showers and three toilets. During my stay, there were 31 hikers doing the via ferrata and staying at Pendant Hut — so be prepared to queue for to use the toilet.
2) Laban Rata Resthouse (3,272m)
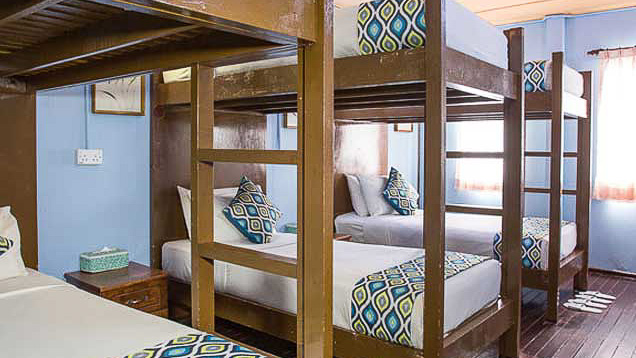
Photo credit: Borneo Calling
Laban Rata Resthouse is the biggest mountain hut at Panalaban Base Camp, with private and shared rooms available. It’s also where the only restaurant is located, meaning all hikers will dine here for dinner. There’s a small grocery shop at reception where you can purchase snacks and last-minute essentials like medicine or gloves. Only cash is accepted here.
3) Panalaban Hostel (3,272m)
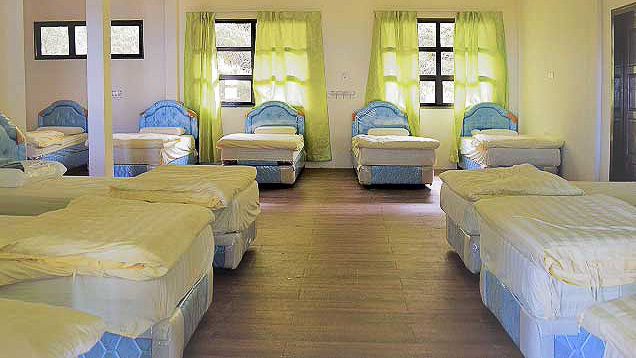
Photo credit: Borneo Calling
Panalaban Hostel is the newest accommodation on the mountain, located just a short walk from Laban Rata Resthouse. The rooms here are hostel-style, unisex rooms.
4) Lemaing Hut (3,230m)

Photo credit: Borneo Calling
This basic mountain hut is reserved for Malaysians and Permanent Residents. It consists of two dormitory-style rooms — housing up to 20 climbers each.
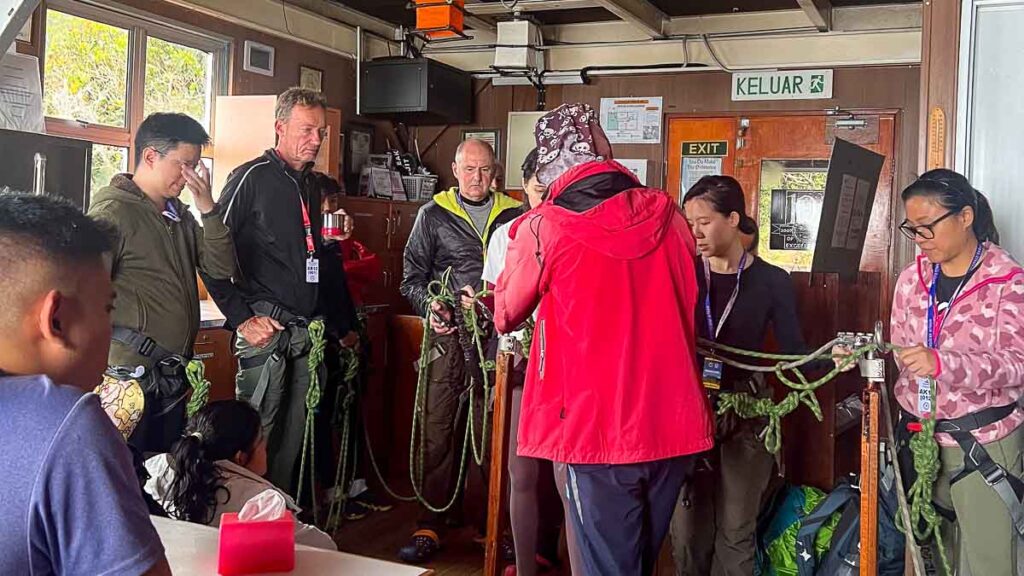
Via Ferrata Briefing
All via ferrata participants have to attend a mandatory activity briefing at 4PM. While I was there, there were 31 hikers (including me) taking on the via ferrata, split among Walk the Torq and Low’s Peak Circuit. We were briefed on the activity cut-off timings as well as how to wear the harness and use the carabiners.
Dinner at Laban Rata Resthouse
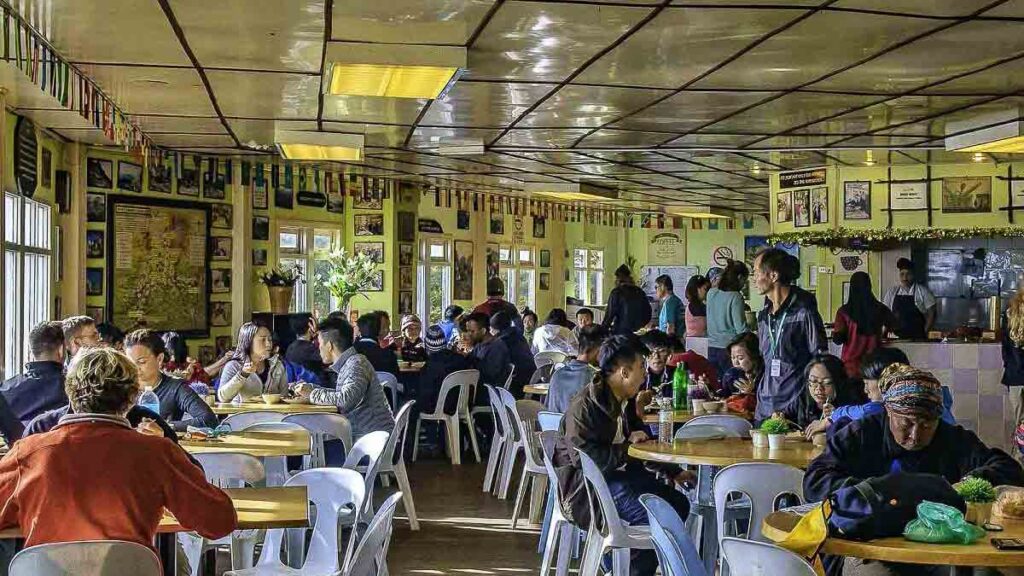
Photo credit: Amazing Borneo
A buffet-style dinner is served between 4:30PM – 7:30PM with dishes like spaghetti, rice, veggies and chicken. You can also purchase drinks here.

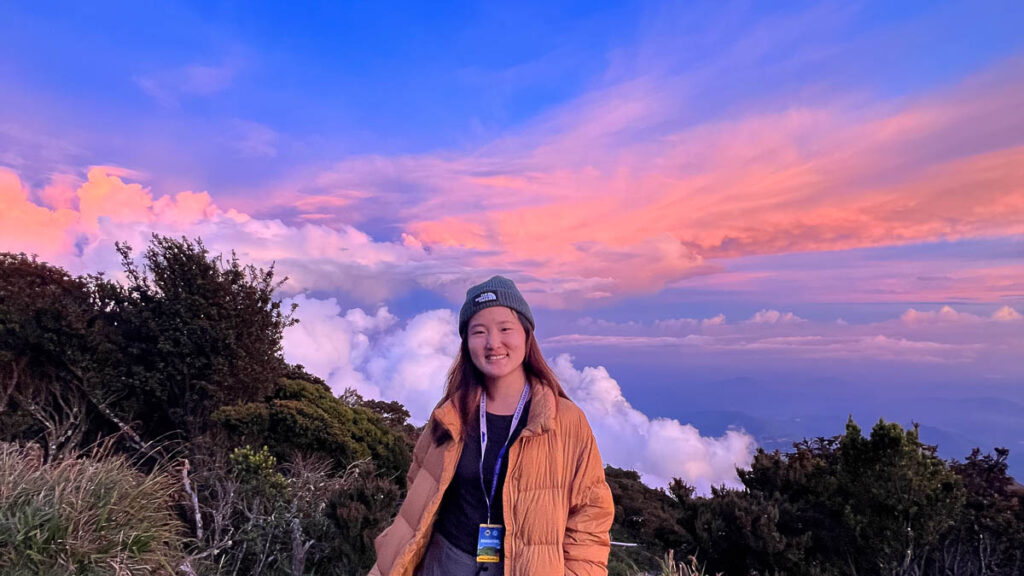
It was extremely foggy when we arrived at Panalaban Base Camp, but the skies cleared up after dinner. We were treated to this gorgeous sunset!
Preparing for the Summit Climb
The gate to the summit opens at 2:30AM, so everyone starts the summit hike at the same time. After dinner, pack your bag for the summit climb and sleep early — you’ll need it.
Lighten your load and leave behind items you won’t be using during the hike (like toiletries and dirty clothes) as you’ll be returning to the hut during the descend to check out. Everyone slept in their hiking attire for the next day to save time the next morning. There are limited toilets, after all!
Packing list for the summit hike:
– Windbreaker
– Extra layer (eg. fleece)
– Raincoat
– Headlamp (with extra batteries)
– Trekking poles
– Beanie
– Gloves
– Water
– Snacks
– Phone strap
There are limited charging points in the rooms, so it’s wise to bring a portable charger. Lastly, check that your headlamp is working. For those who think you can do a sunrise hike just relying on your phone torchlight, you can’t. You’ll need your hands free for some sections!
Day 2: Summit Climb (4,095m) and Via Ferrata

Photo credit: @bryan_hys via Unsplash
Distance: 2.7km
Duration: 3 – 4 hours
Temperature: -3°C – 8°C
Be prepared to be woken up by other climbers as early as 1AM the next morning. I set an alarm for 1:40AM which was more than enough time to get ready, but many climbers were up way before then. It’s a hostel-style accommodation so once a few guests are up and moving, everyone is awake.
For via ferrata climbers, a light breakfast is served at Pendant Hunt before the climb. We had bread, coffee and tea at 2AM. There’s only one bathroom between the start point and the summit, so make sure to go to the toilet before starting.
I wore tights and trek pants for bottoms, plus a dri-fit long sleeve shirt. It was pretty cold in the morning so I piled on my fleece and windbreaker, but quickly took off the fleece as it got hot once I started hiking.
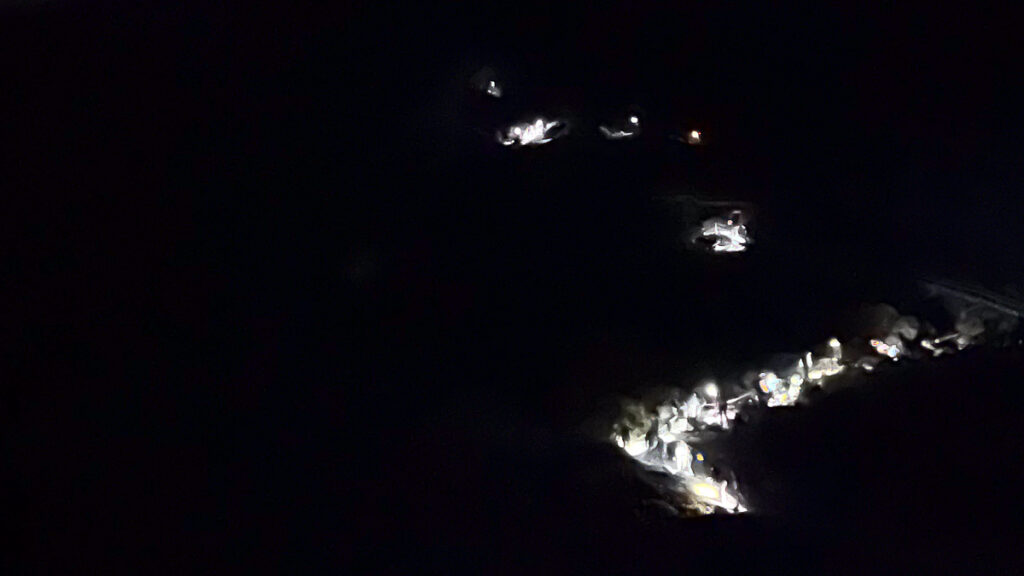
The first section of the summit hike to Sayat-Sayat Hut (3,668m) consists of a lot of steps on a narrow path. Since all hikers are starting at 2:30AM, you can expect a snaking, single-file climb for the first 1.5 hours.
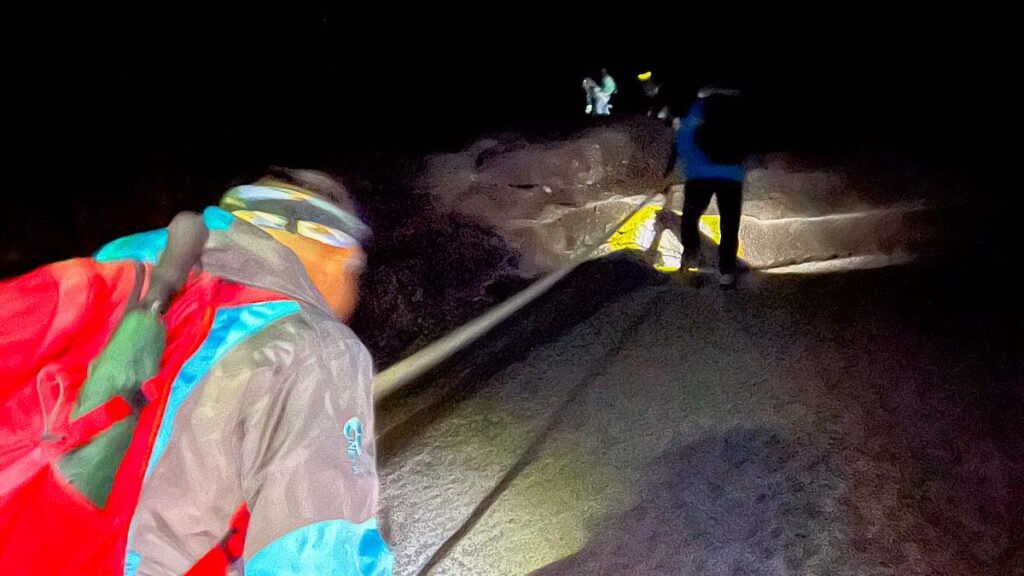
There are some steep sections that require you to be on all fours, with the use of a rope.
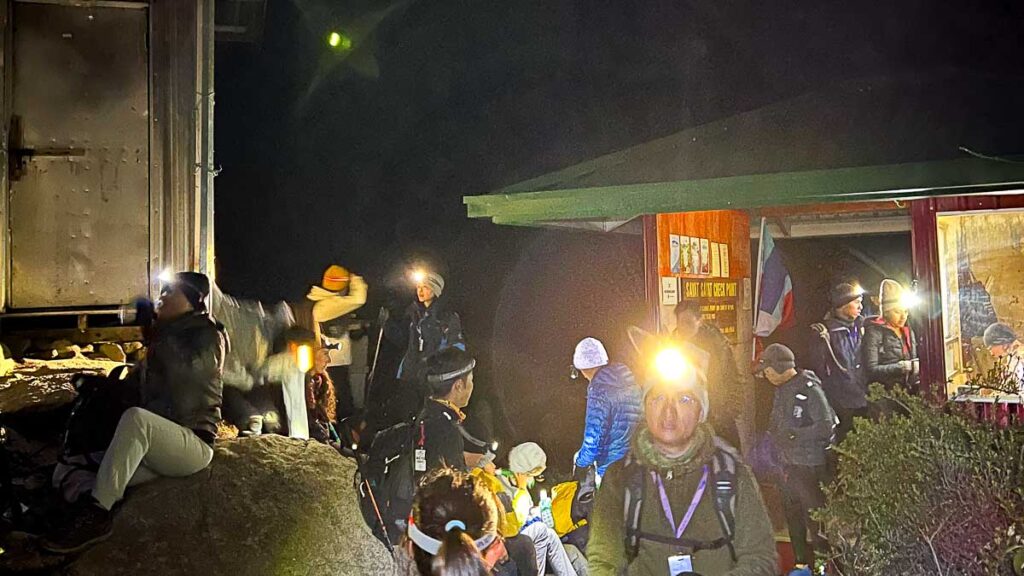
At Sayat-Sayat Hut, there’s an official checkpoint where you’ll have to show your climbing tag. This is also your last chance to visit the bathroom. We arrived here at 3:55AM!
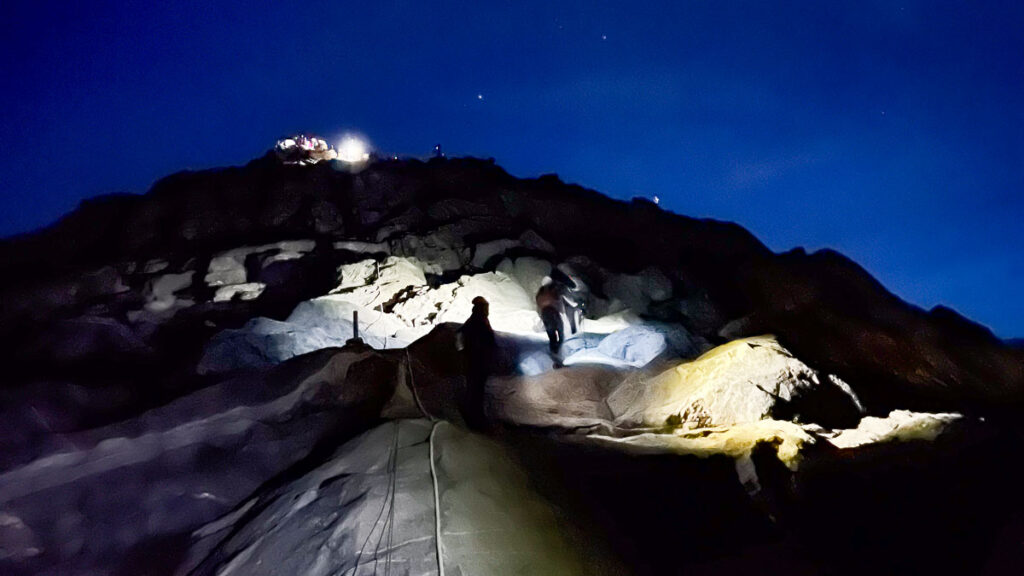
After this checkpoint, the trail opens up to bare granite rock with steep inclines. There isn’t a fixed trail here anymore — our guide led the way and showed easier paths to take. This portion felt like it went on for a long time and I feel is the most mentally challenging part of the hike.
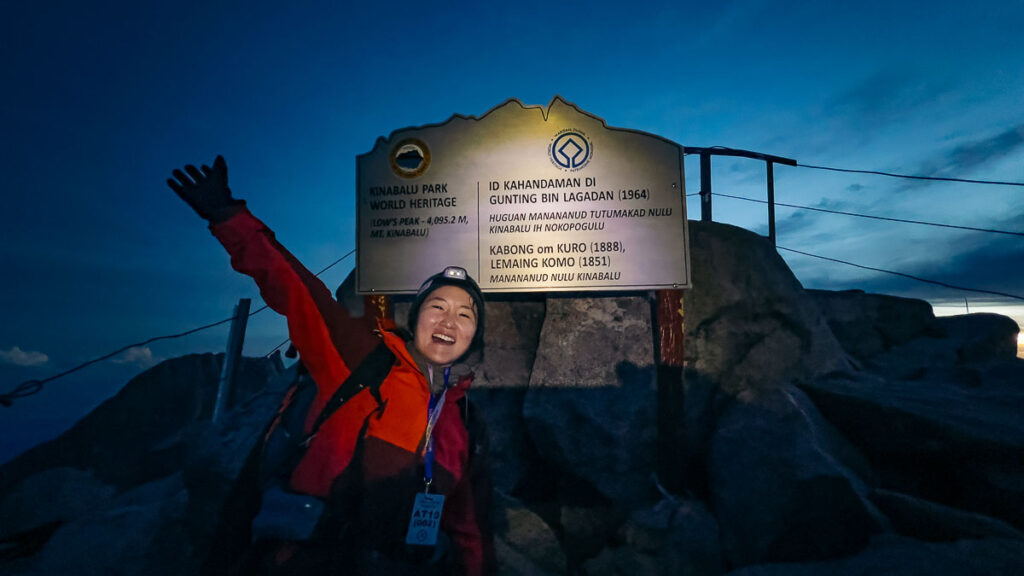
We arrived at the summit, Low’s Peak (4,095.2m), at 5:40AM. The actual peak of Mount Kinabalu (where the sign is) isn’t a large area, so we had to queue to take photos. I was so happy to have completed a hike that’s been on my bucket list for years. Especially since my mum is from Kota Kinabalu and has done the hike herself!
At the summit, the temperatures goes as low as 4°C and below. Weather-wise, we were relatively lucky. It was cloudy meaning no nice sunrise, but there was no rain or wind — so the temperature was manageable. I’ve had friends who summited in really windy conditions, where they had to pack on three to four layers of winter clothing. On that day, I wore just a dri-fit t-shirt and a windbreaker on top.
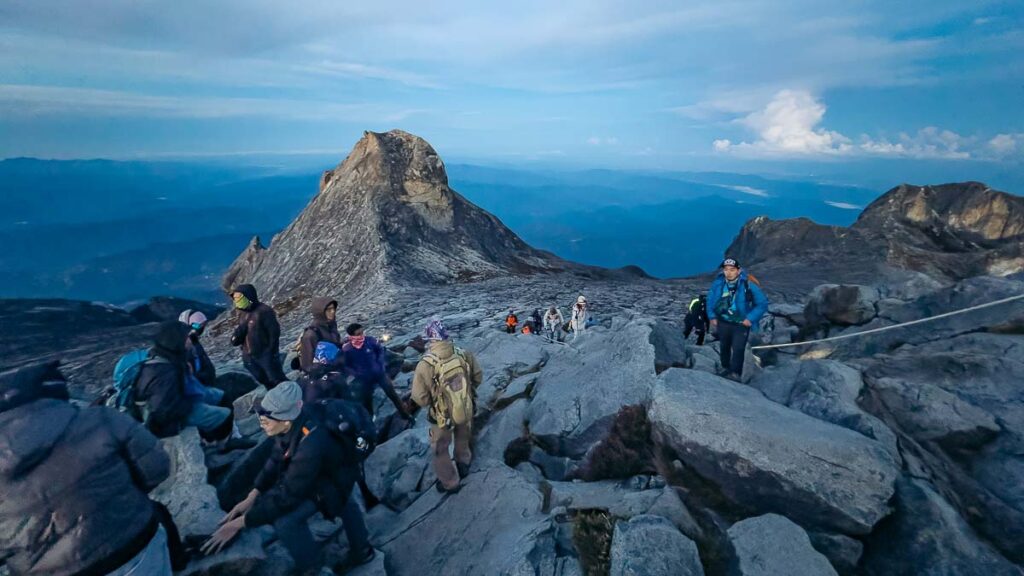
After that, we made our way down to the meeting point of the via ferrata, Sayat-Sayat Hut (3,668m). Our pace was good, so we could take our time and stop for photos along the way.
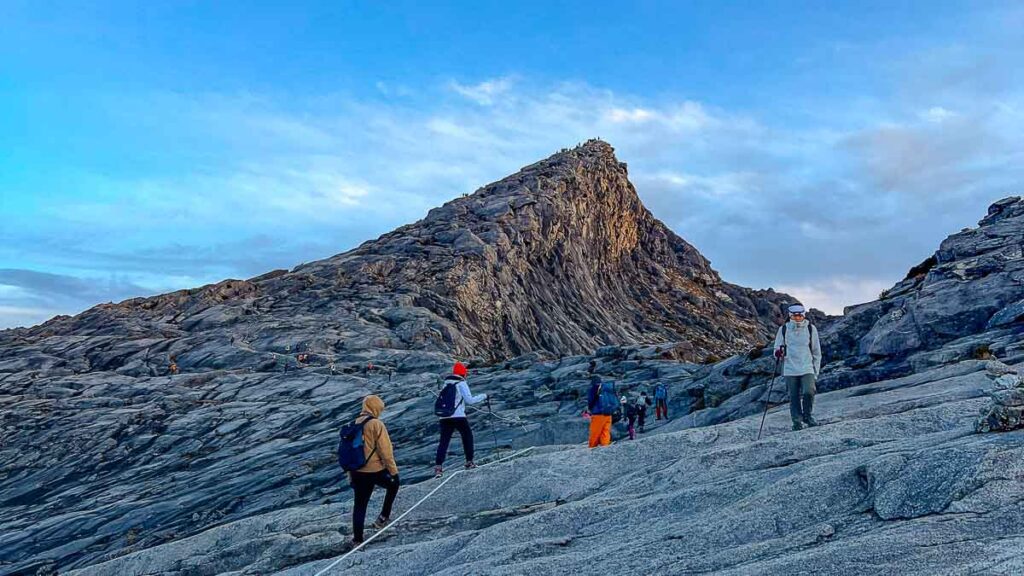
Our guide advised using trekking poles here as some sections are quite steep.
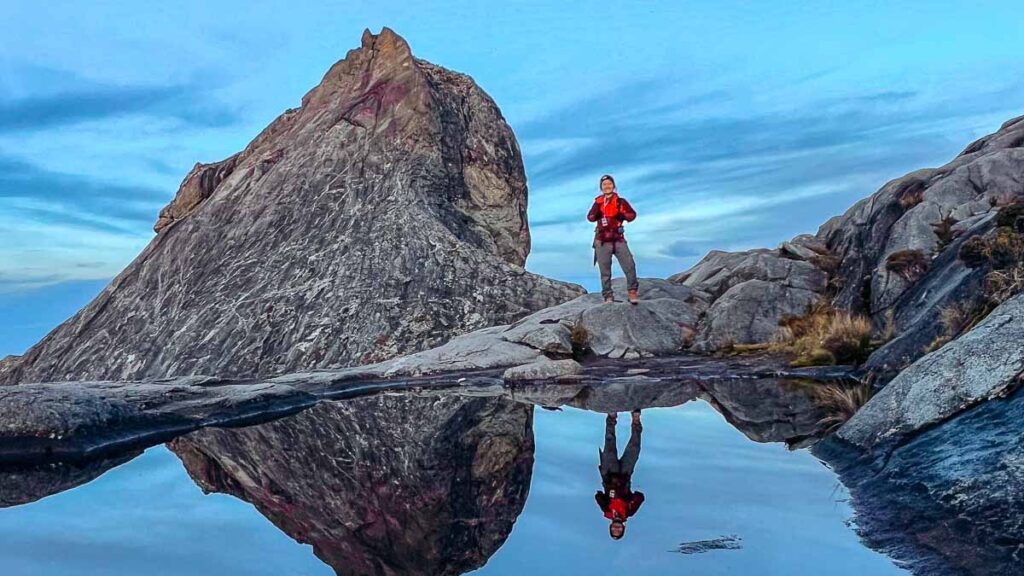
There’s a small lake that reflects St John Peak (4,086m) — a nice spot for photos! Mount Kinabalu also appears on the Malaysia RM100 note, specifically a peak you’ll notice on the way down.
Via Ferrata — Walk the Torq
Via Ferrata Cut-off Timings
Walk the Torq: 7:15AM
Low’s Peak Circuit: 6:40AM
We arrived at the via ferrata meeting point with plenty of time to spare. The Walk the Torq was my first via ferrata course and it was definitely a highlight of my Mount Kinabalu experience. It’s basically a giant obstacle course with stunning views — what’s not to enjoy?
It starts off with us getting split into groups of four, with one guide assigned to each group. Our starting order was also decided — this is important as there’s no overtaking during the course as everyone is strapped into a safety line! With roughly four to five groups doing the course, the difference between the first and last group finishing could be over an hour.
Luckily, my group went first, which meant that we finished first and could make our way back to Laban Rata Hut for breakfast. Trust me, you’ll be really hungry by this point.
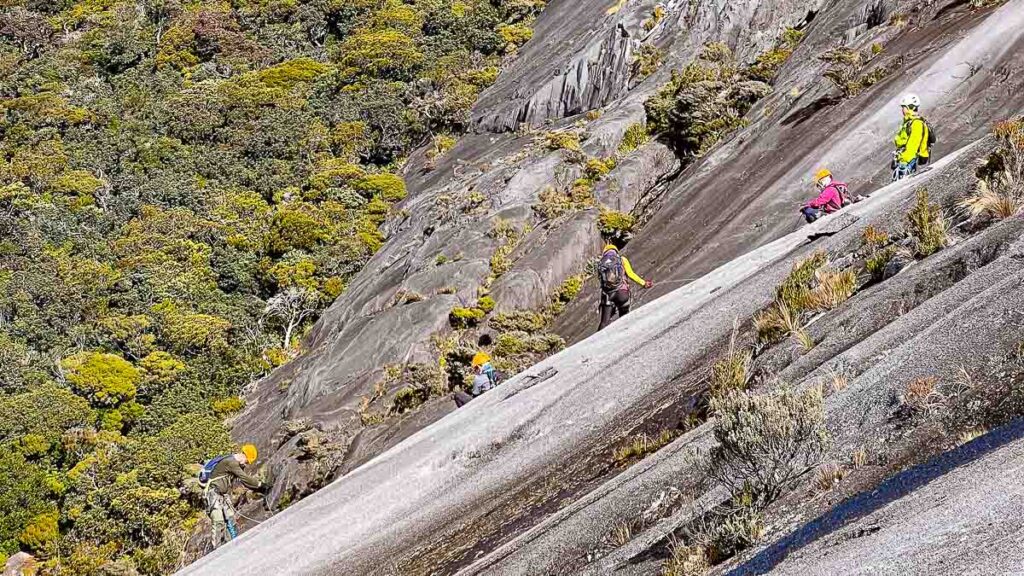
The course started with us descending down a slope. I have a fear of heights, but this was manageable. Besides your two carabiners which are attached to the route line, you’re also strapped to the other people in your group — an extra layer of safety.
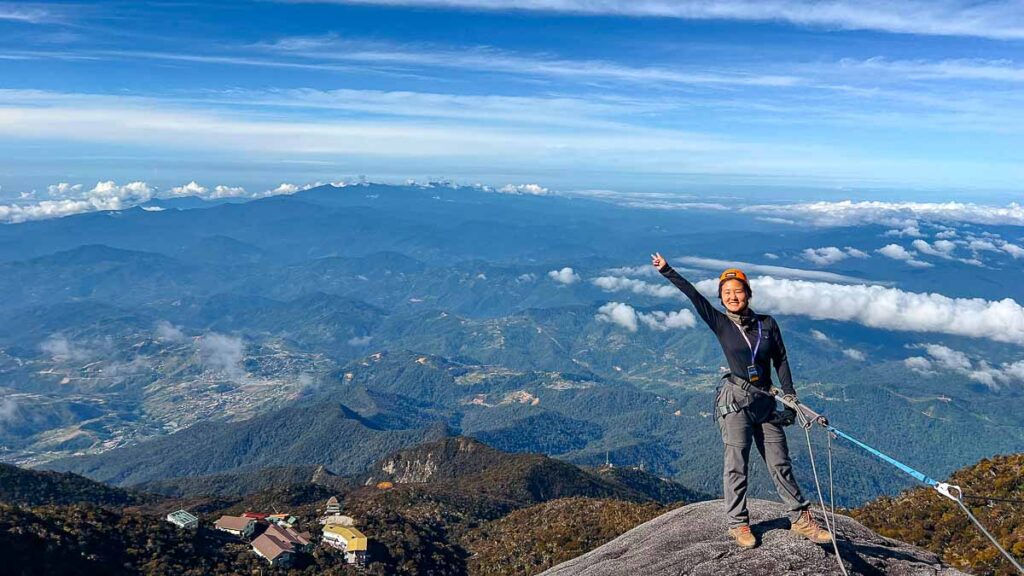
Despite a cloudy sunrise, the weather cleared up and we had this incredible panoramic view.
*Pro-tip: Bring a phone strap! You’ll be asked to empty your pockets (including phones!) for the course, but they allowed me to bring my phone along since it had a strap I could hang around my neck.
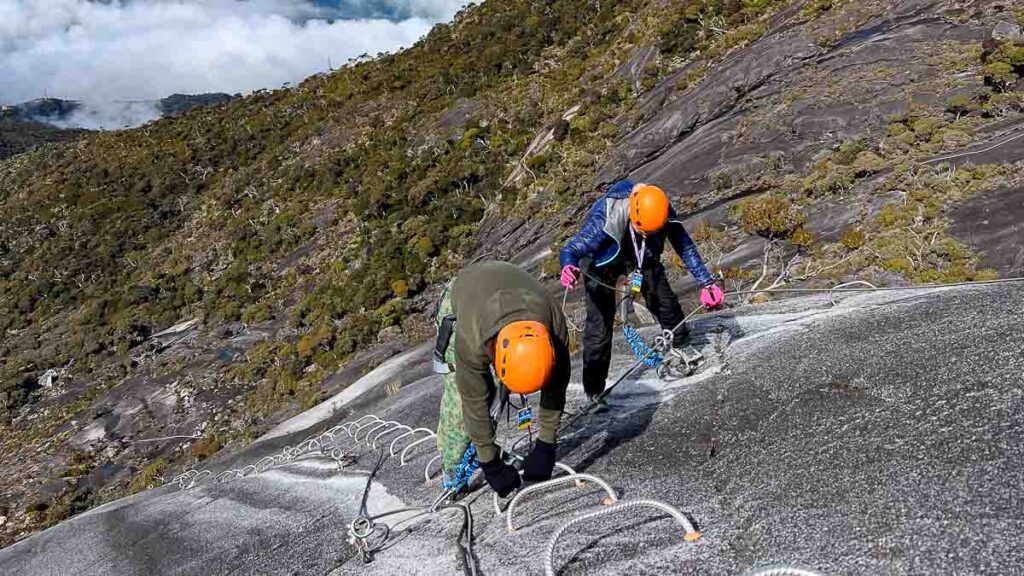
After roughly 1.5hours of descending, we had to make our way back up to the starting point. This involved climbing metal rungs built into the rock at a steep angle — probably the most challenging part of the course! The entire course took us around 2hours (7:45AM – 9:45AM), after which we took an hour to hike back to Laban Rata Resthouse at Panalaban Basecamp.
One thing to take note — the via ferrata is not a separate route going down the mountain, but instead an additional obstacle course. After that, you’ll still have to hike down the mountain the same way (and distance) as the non-via ferrata hikers.
Panalaban Base Camp (3,290m) to Timpohon Gate (1,866m)
Distance: 6km
Duration: 3 – 6 hours
Temperature: 18°C – 24°C
After a quick breakfast at Laban Rata Resthouse and a change of clothes, we began our descent down the mountain. It took us about 4 hours to arrive back at Timpohon Gate. There’ll be an additional guide fee if you arrive after 4PM (about RM15 for every extra hour).
It started drizzling on-and-off in the last hour of our hike and began full-on pouring in the last 10 minutes. The weather at Mount Kinabalu is unpredictable and you cannot do it without a rain jacket or poncho!
Mount Kinabalu Packing List
Recommended attire for day 1: Dri-fit tee and comfortable bottoms (shorts, trek pants or tights) and hiking boots.
There’s no need to bring a huge backpack since you’re only staying one or two nights. A good size backpack is 18L – 25L and there are several affordable options at Decathlon. Try to keep your climbing bag below 8kg — the lighter it is, the easier your climb will be!
What to pack in your overnight bag
– Extra dri-fit tee (for summit hike)
– Trek pants
– Underwear and socks
– Windbreaker
– Fleece or Ultra Light Down
– Raincoat
– Beanie
– Gloves
– Buff
– Headlamp (with extra batteries)
– Portable charger
– Hiking poles
– 1.5L of water (minimum)
– Snacks (I highly recommend sour gummies for a hike!)
– Hand sanitiser and tissue paper
– Slippers (for showering) — but they’re provided at Pendant Hut for via ferrata climbers!
– Toiletries (these aren’t provided)
– Microfibre towel
– Medication
Note: You can leave items at your base camp accommodation when you hike to the summit.
Preparing for Mount Kinabalu
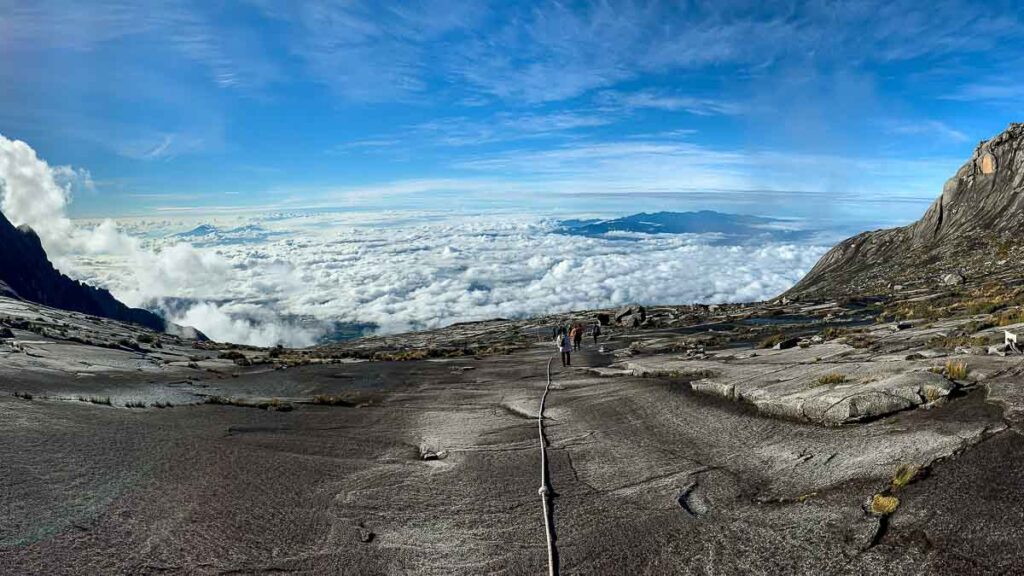
Photo credit: @delacrixmorgan via Unsplash
While we did say Mount Kinabalu is suitable for beginner hikers, it’s definitely more enjoyable with some pre-training, even for those who exercise at gyms often.
I personally believe that trekking fitness is different from gym fitness. It uses a different set of muscles and takes more endurance! Even though I exercise frequently, my friends and I made it a point to train up in the weeks leading to our trip.
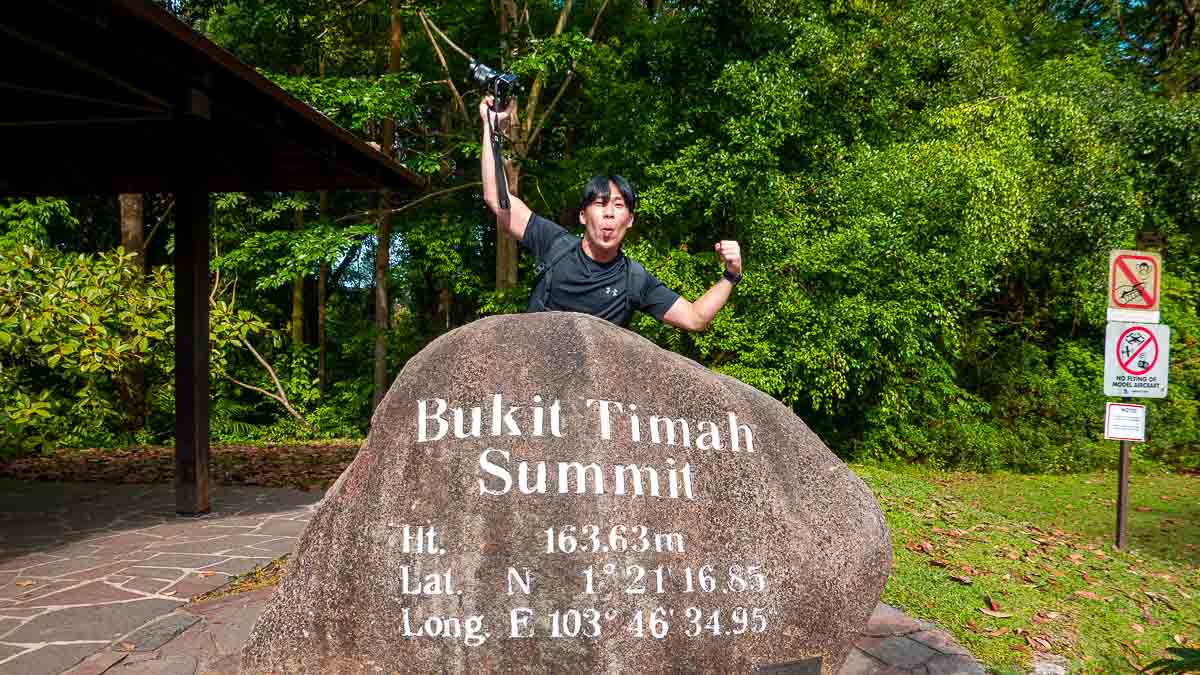
Stairs training will be your new best friend. Many hikers training for overseas trips do so at Bukit Timah Hill — Singapore’s highest point. It’s only 164m, so you’ll have to climb up and down a few times per visit for it to be any use.
Read also: Hiking at Dairy Farm Nature Park — Singapore’s most Immersive Forest Trek
This is also a great chance for you to break in your new hiking shoes or check the condition of your old shoes. Old hiking shoes that haven’t been worn in a long time tend to fall apart, and you don’t want that happening while climbing Mount Kinabalu itself.
Lastly, add some weight to your backpack to simulate what you’ll be carrying during the hike. You could add a few 1.5L bottles or throw in some weights in a backpack during your Bukit Timah Hill training sessions. We visited Bukit Timah Hill about three or four times, carrying at least 6kg each visit. There are a few sections of stairs, so we just went up and down six times.
Overall, Mount Kinabalu was a fun hiking experience with friends. It’s short, achievable and the views are great! My highlights are the gorgeous post-dinner sunset at Panalaban Basecamp, standing at the summit and the views during the Walk the Torq circuit. Looking back, I think we could have done the Low’s Peak Circuit for our first via ferrata attempt 👀
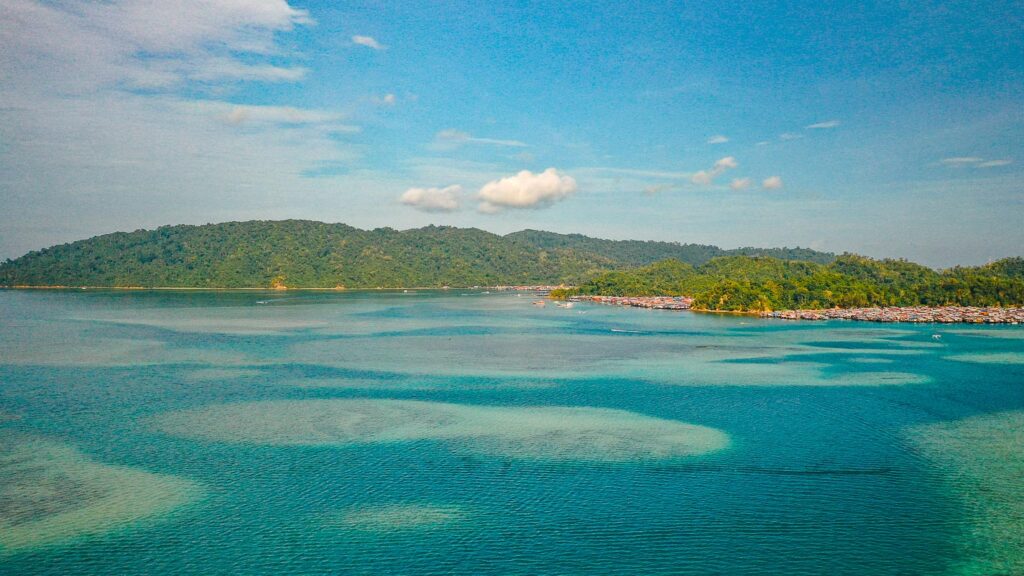
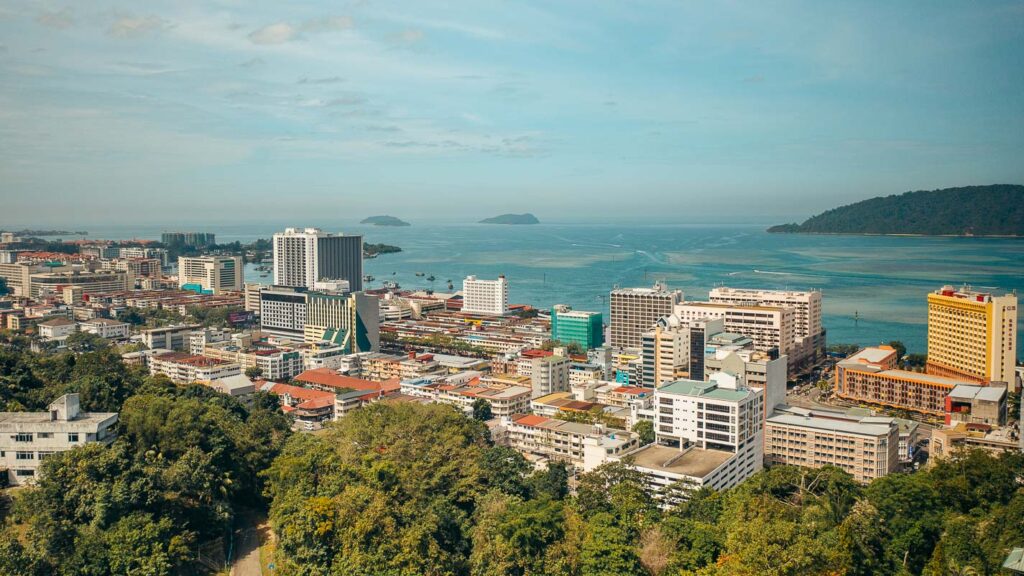
After climbing Mount Kinabalu, take the time to explore Kota Kinabalu before heading home! For those who still have energy, go on a snorkelling tour around Tunku Abdul Rahman National Park or try white water rafting at Kiulu River. If you’d prefer to relax post-hike, there’s plenty of sightseeing, shopping and spa options.
Read also: 20 Things to Eat-See-Do in Sabah’s Capital Besides Climbing Mount Kinabalu
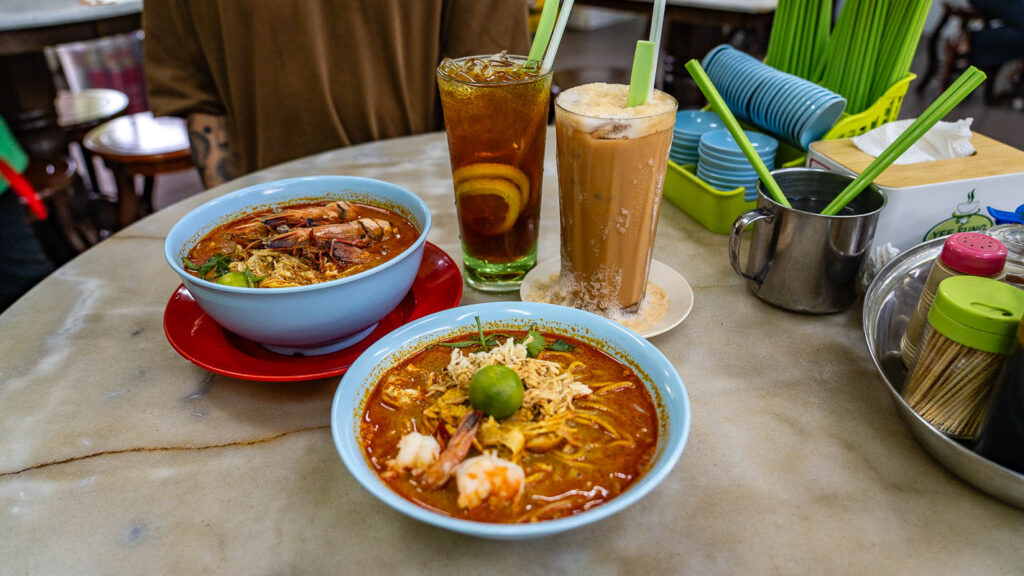
Also, the food scene in Kota Kinabalu is not to be missed. There’s so much delicious local food that’s affordable — feel free to stuff yourself now that the hike is over!
Planning to go on more hikes? These guides might just inspire your next trip:
– The Ultimate List of 23 Hiking Trails in Singapore — Ranked from chill to adventurous
– 21 Most Rewarding Hikes Around the World — From Stunning Glaciers to Active Volcanoes
Any other tips for climbing Mount Kinabalu? Share with us in the comments!


Thanks for informative blog